
Space administrators can stop or resume syncing for multiple pages from the Synced Spaces List. This is useful when you want to temporarily exclude selected pages from syncing without opening each page individually.
Open Manage page sync
-
Open Synced spaces list from the space settings page.
-
Locate the space sync you want to manage.
-
Open the Actions menu and select Manage page sync.
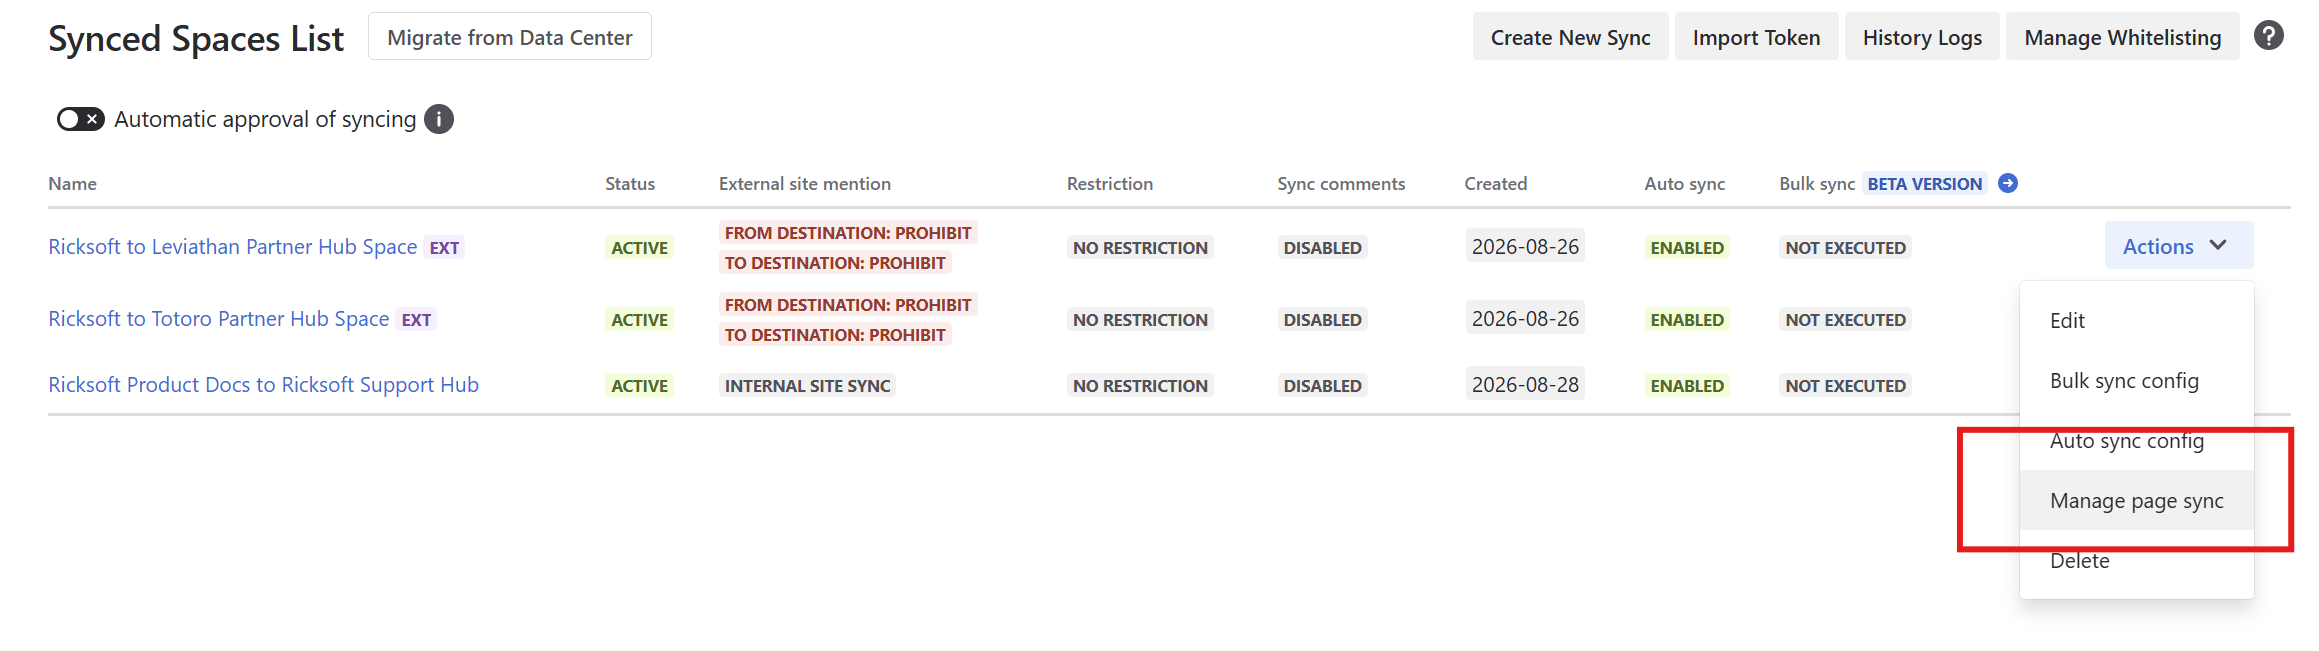
The Manage page sync dialog contains two tabs:
-
Syncing — pages that are currently allowed to sync.
-
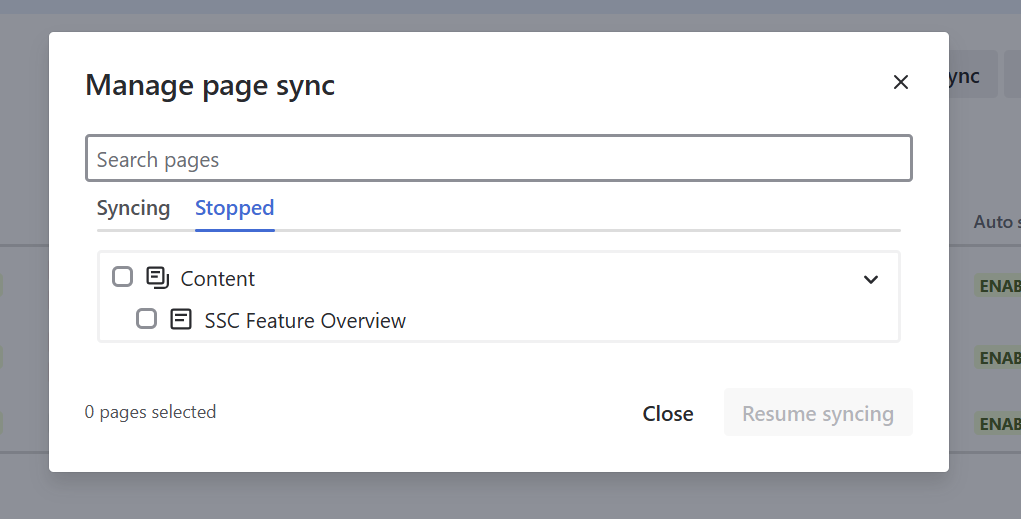
Stopped — pages where syncing has been stopped for this space sync.
Stop syncing multiple pages
-
Open the Syncing tab.
-
Select the pages you want to stop syncing.
-
Select Stop syncing.
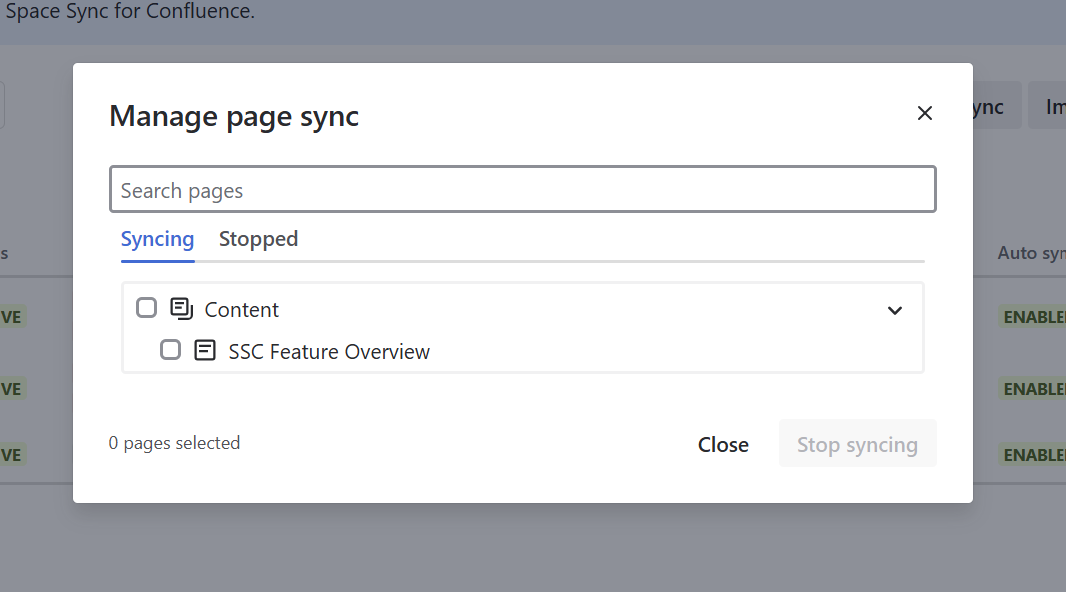
After the action succeeds, the selected pages move to the Stopped tab.

What happens to stopped pages
-
The existing destination pages are retained.
-
Auto-sync does not update stopped pages for this space sync.
-
Bulk sync skips stopped pages for this space sync.
-
Other pages in the same space sync are not affected unless they are also selected and stopped.
Resume syncing multiple pages
-
Open the Stopped tab.
-
Select the pages you want to resume syncing.
-
Select Resume syncing.
-
Review the confirmation message.
-
Select Overwrite and resume to continue.
Resuming syncing replaces the selected destination pages with the current source versions. Changes made directly in the destination while syncing was stopped will be permanently lost.
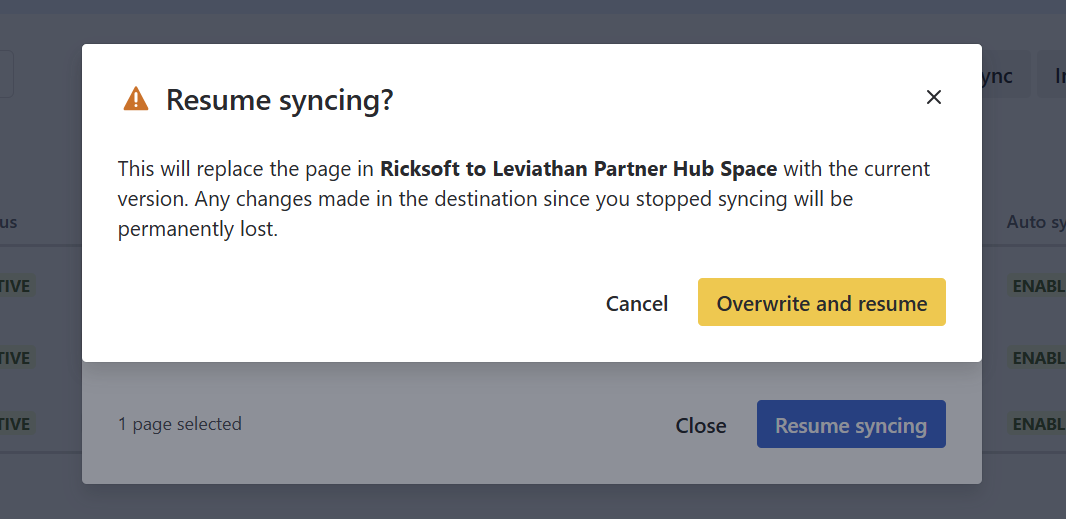
After the action succeeds, the resumed pages move back to the Syncing tab.
Review Stop and Resume activity
Stop syncing and Resume syncing actions are recorded in the Synchronization Log. You can use the log to review who performed the action and whether it succeeded or failed.
Screenshot to add: Synchronization Log showing examples of Stop Sync, Resume Sync, Bulk Stop Sync, or Bulk Resume Sync entries.
Capture the relevant columns only: Timestamp, Triggered By, Sync Type, Source/Destination Content, and Status.

Related guide
For page-level Stop and Resume actions, see How to Stop and Resume Page Syncing.