Prerequisite
-
Space admin permission
-
Data Center site is connected with Cloud site.
-
Read more: How to connect external Cloud sites
-
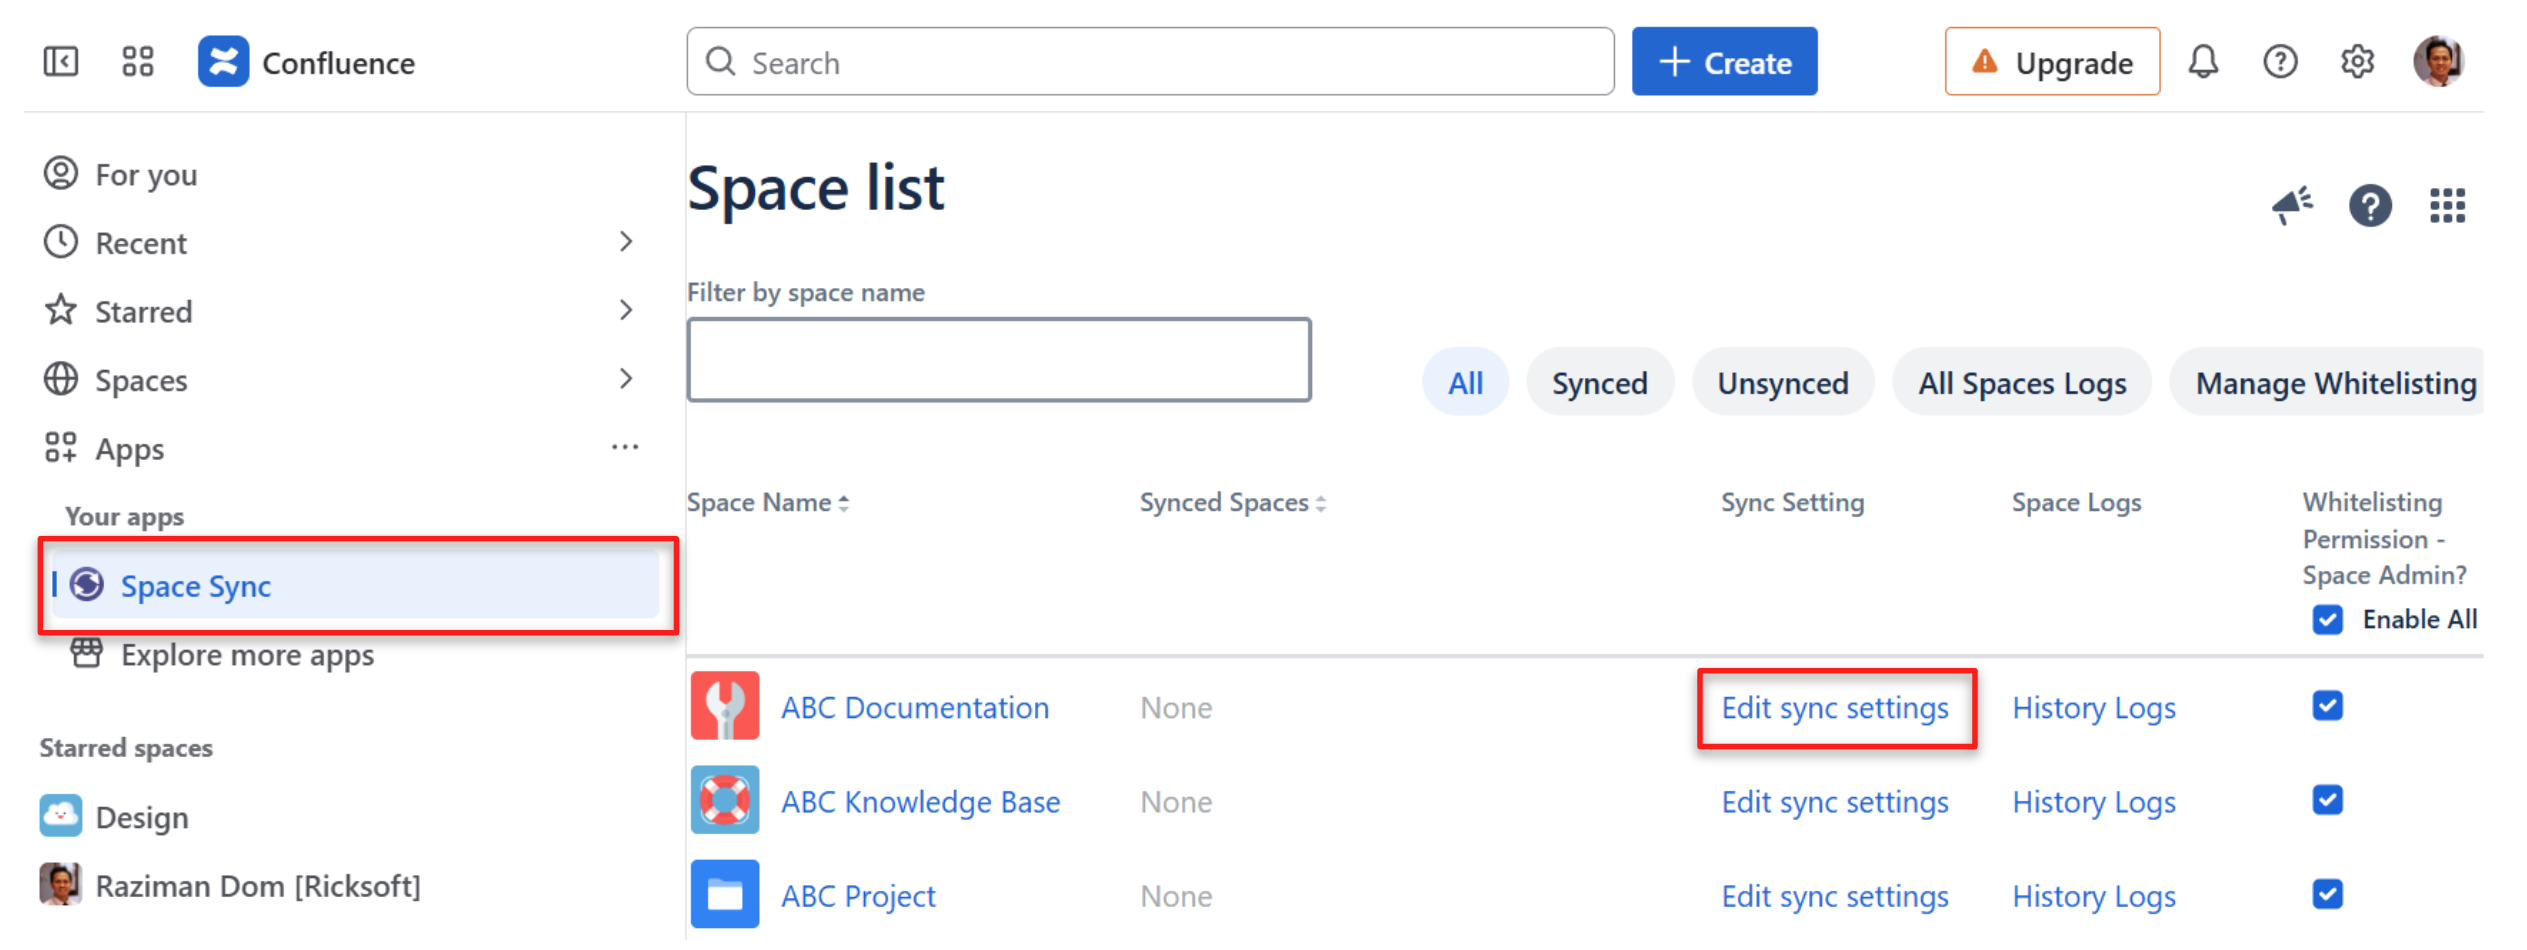
Step 1: Generate Cloud Space Token
Each Space token is unique. If you have 10 spaces in your Cloud site, you need to create a token for each of them. This is to provide better security control to Space admin.
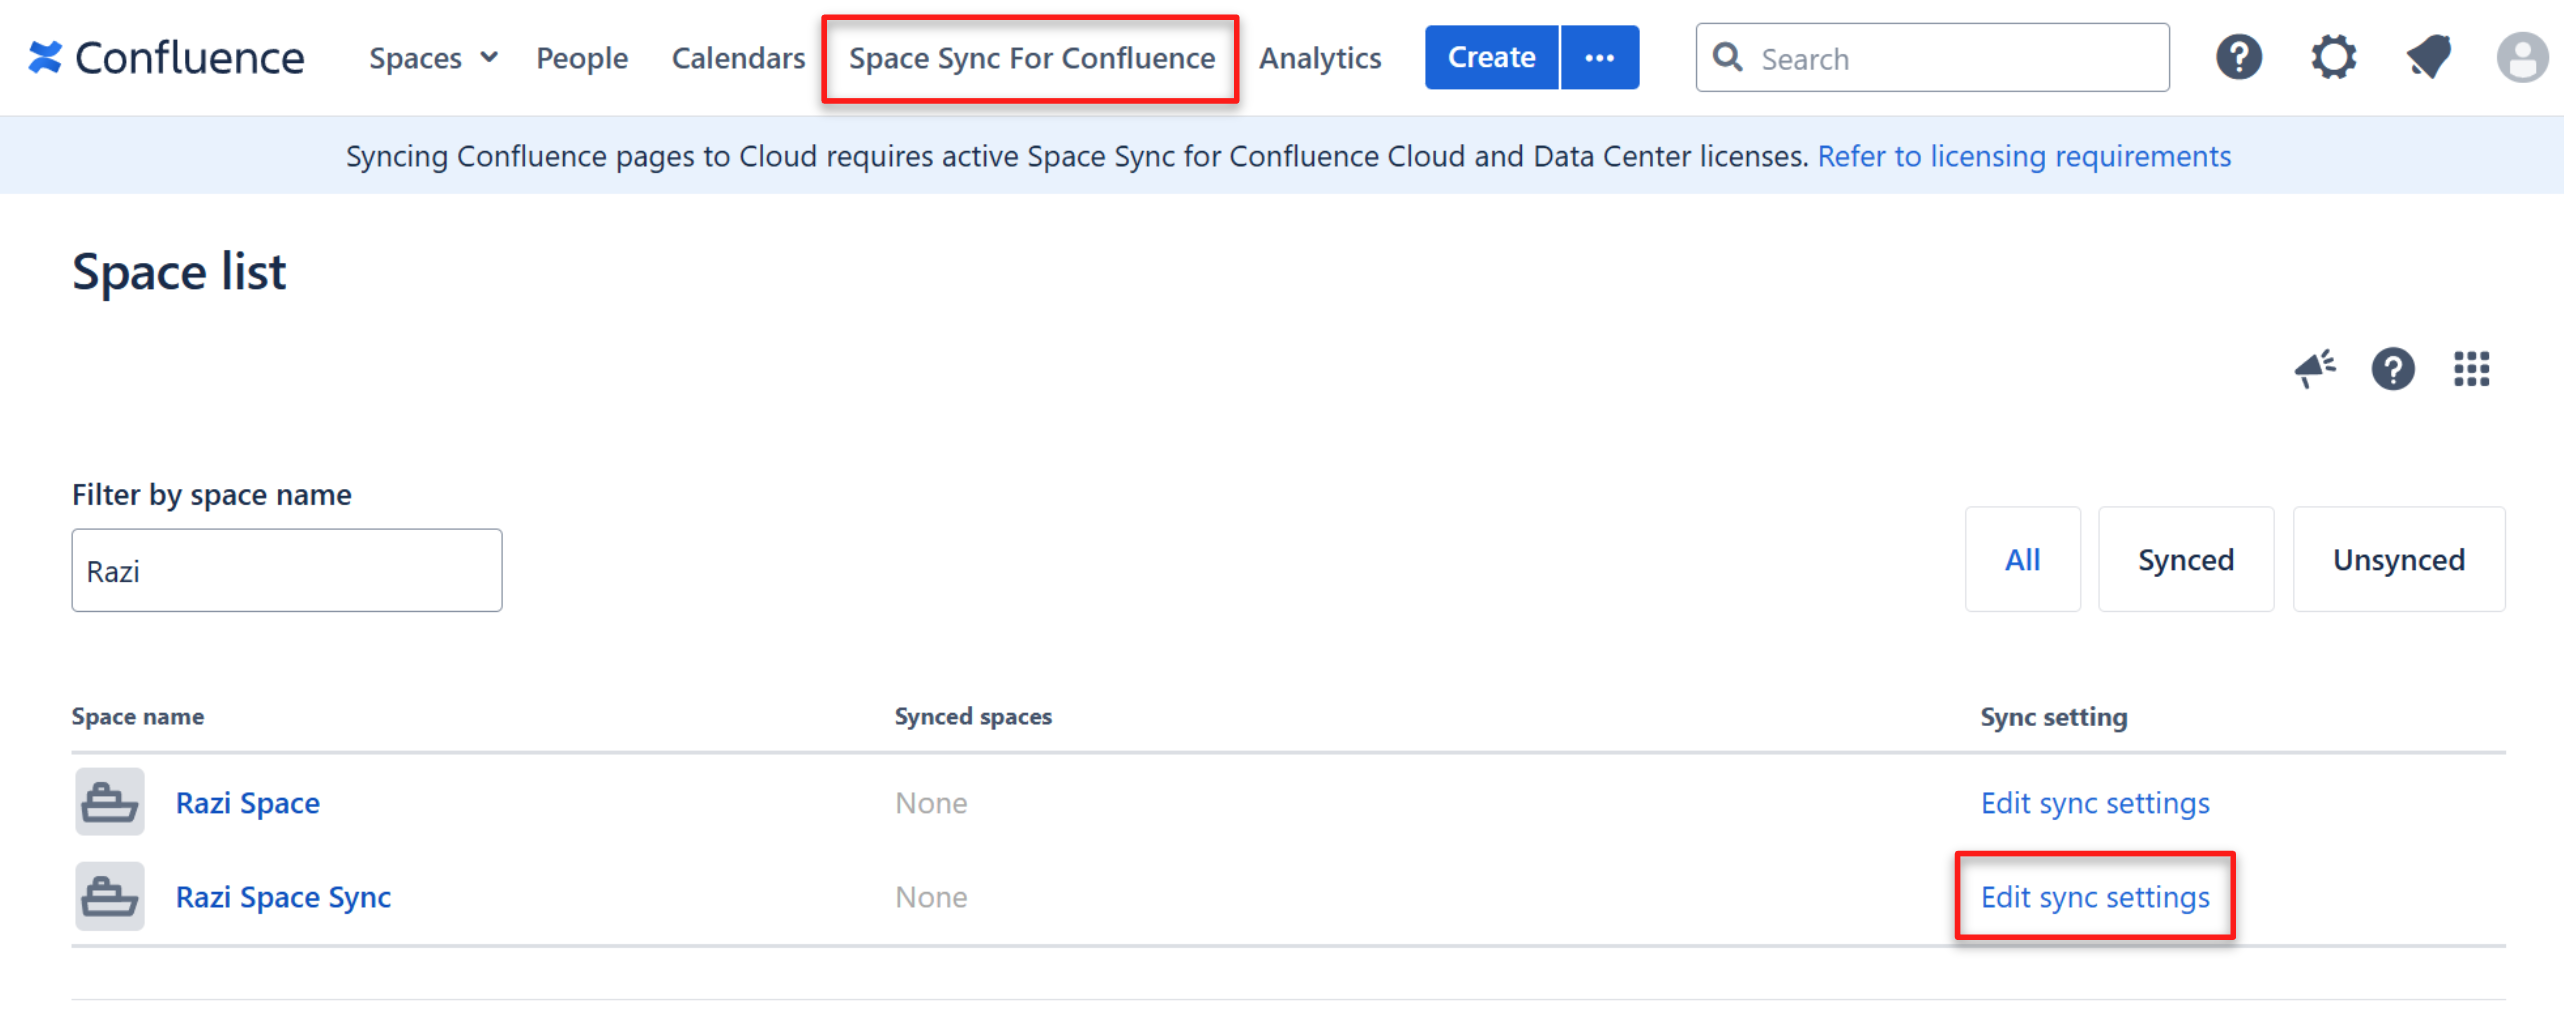
To generate the Space Token, go to your Cloud site then navigate to Space Sync app. On this page there is a list of spaces that you have in your Cloud site. Click “Edit sync settings”.
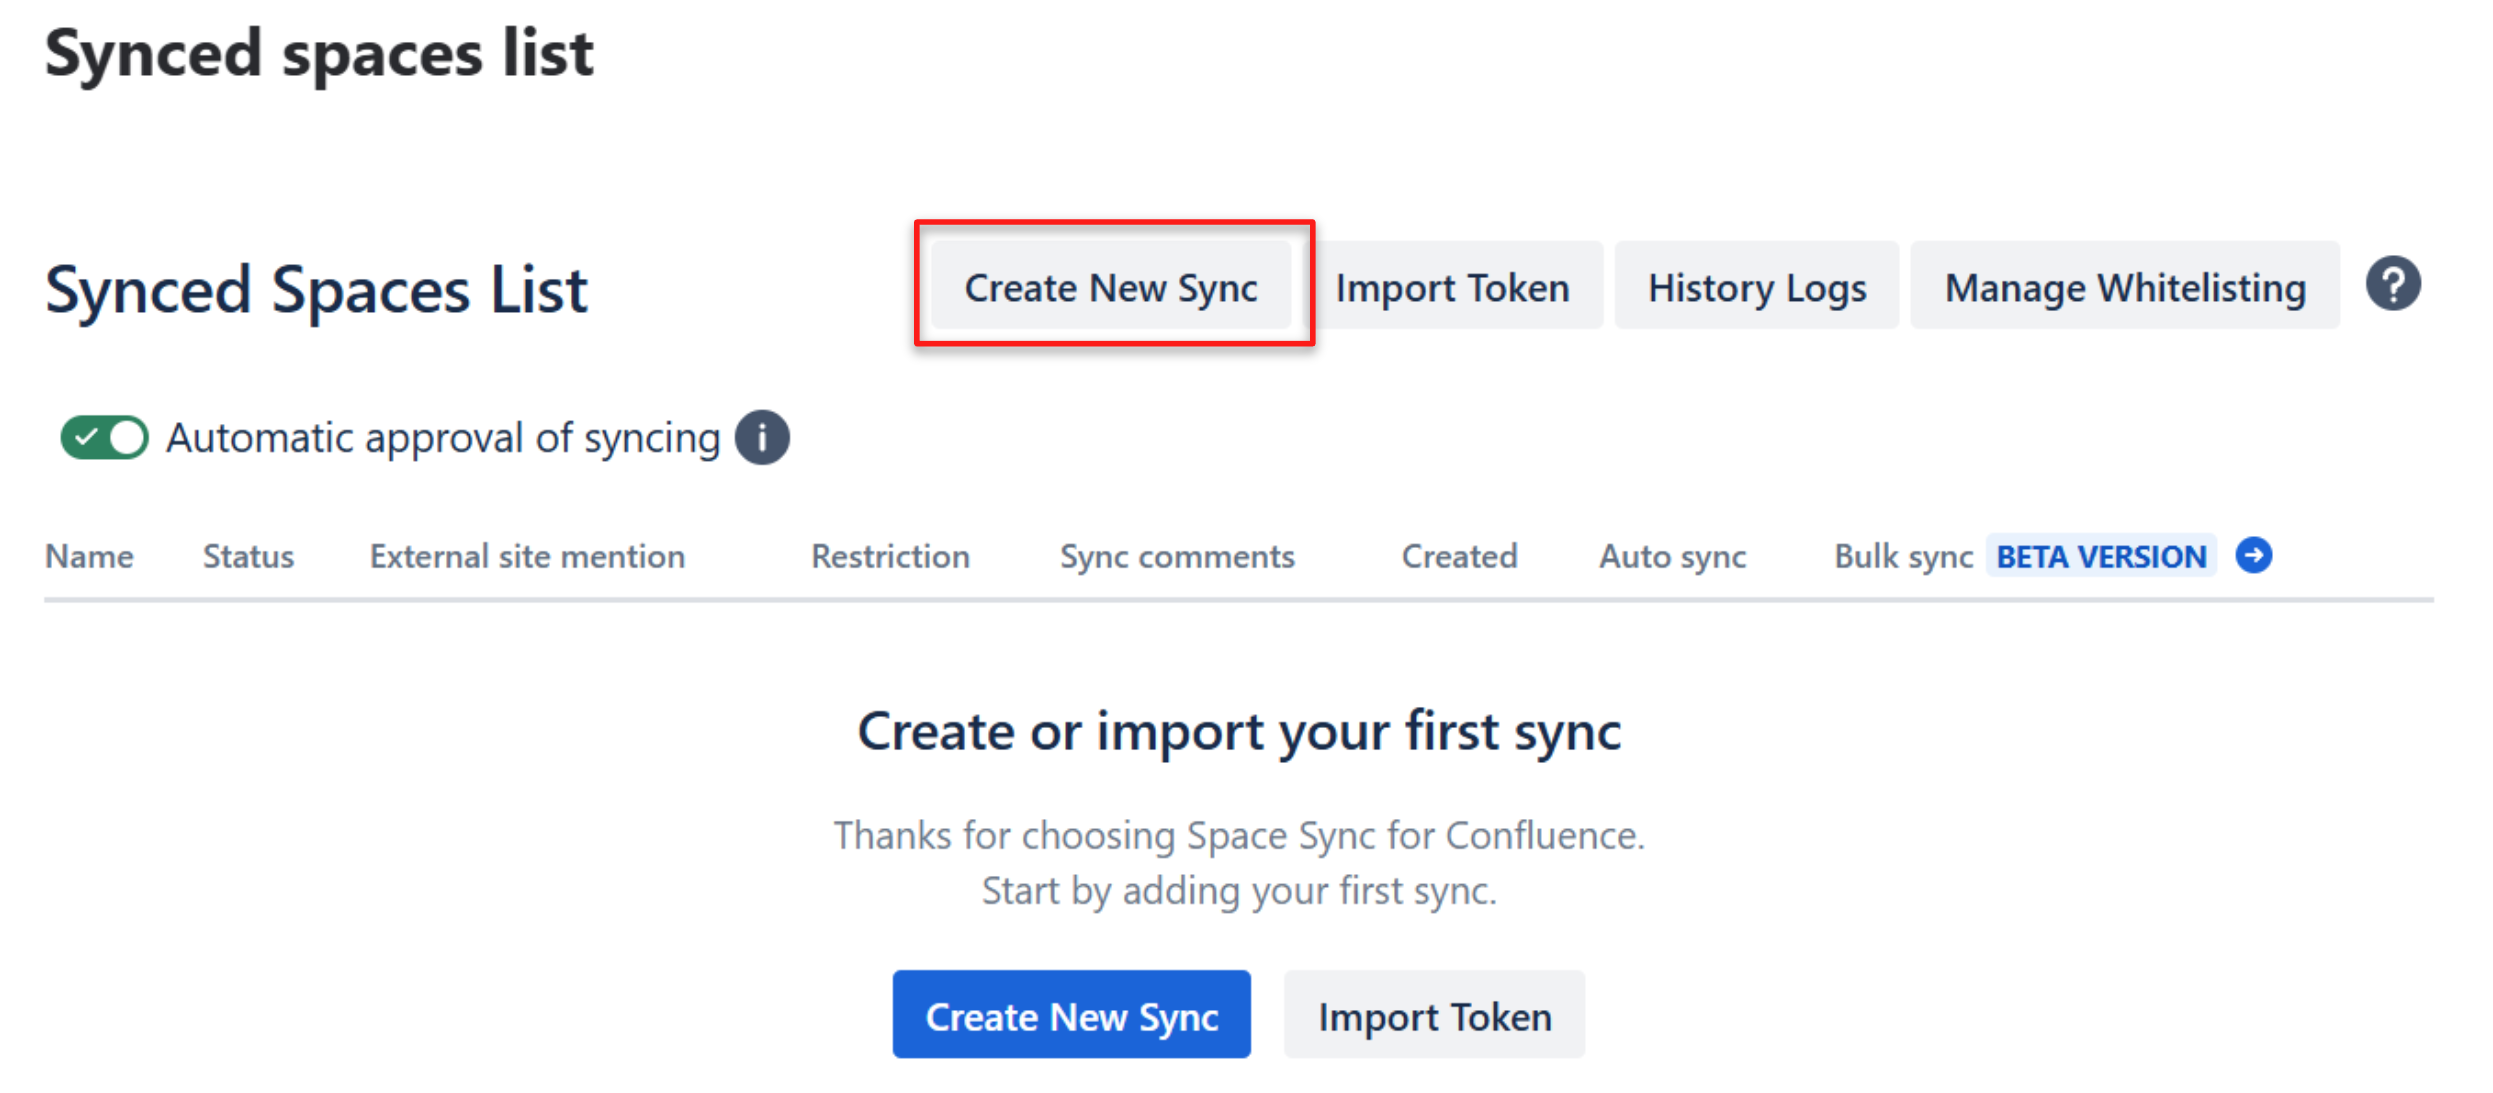
Click the Create New Sync button.
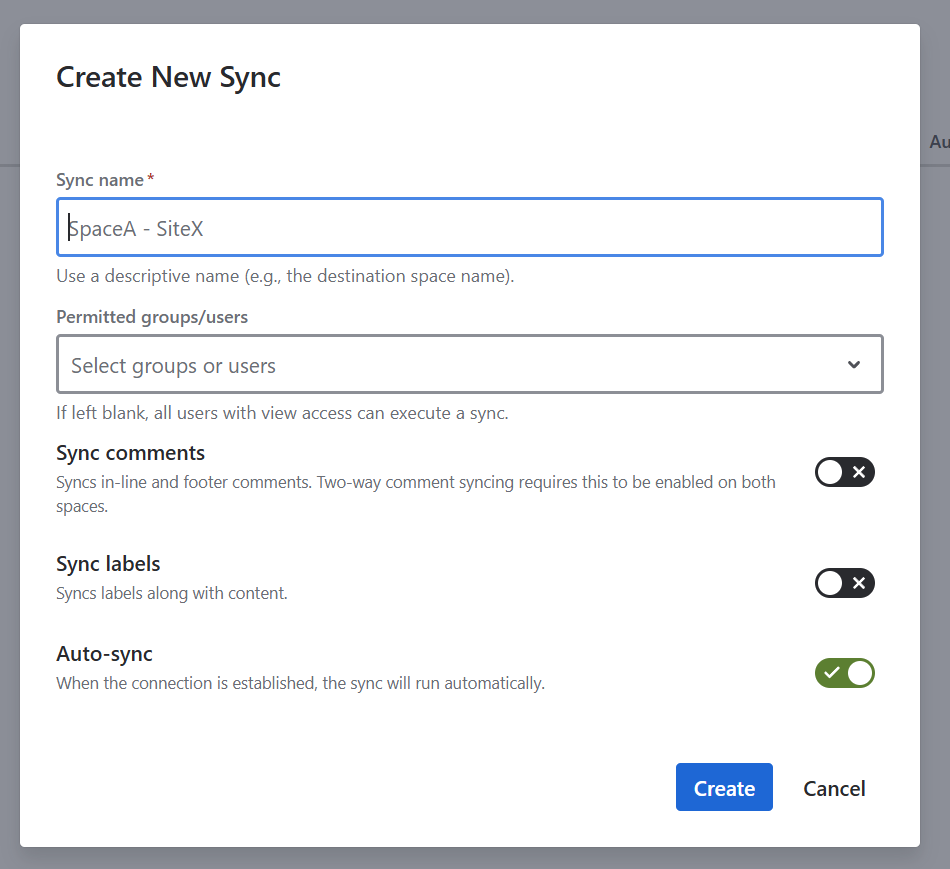
Enter the Name of the Space and permissions. You have the option to sync comments and labels on this setting. Once you have done, click Create button.
We highly suggest add the name of the source space as this will appear as message when the token is imported by the destination space
If you successfully created the space synchronization, it will be added to synced spaces list. At the initial creation, the Status is NOT SYNC YET . You need to import the token to Data Center site.

Step 2: Sending a Token to the Destination Space Admin
There are two ways to send the token to the destination space for syncing:
Option 1: Send Token via Email
-
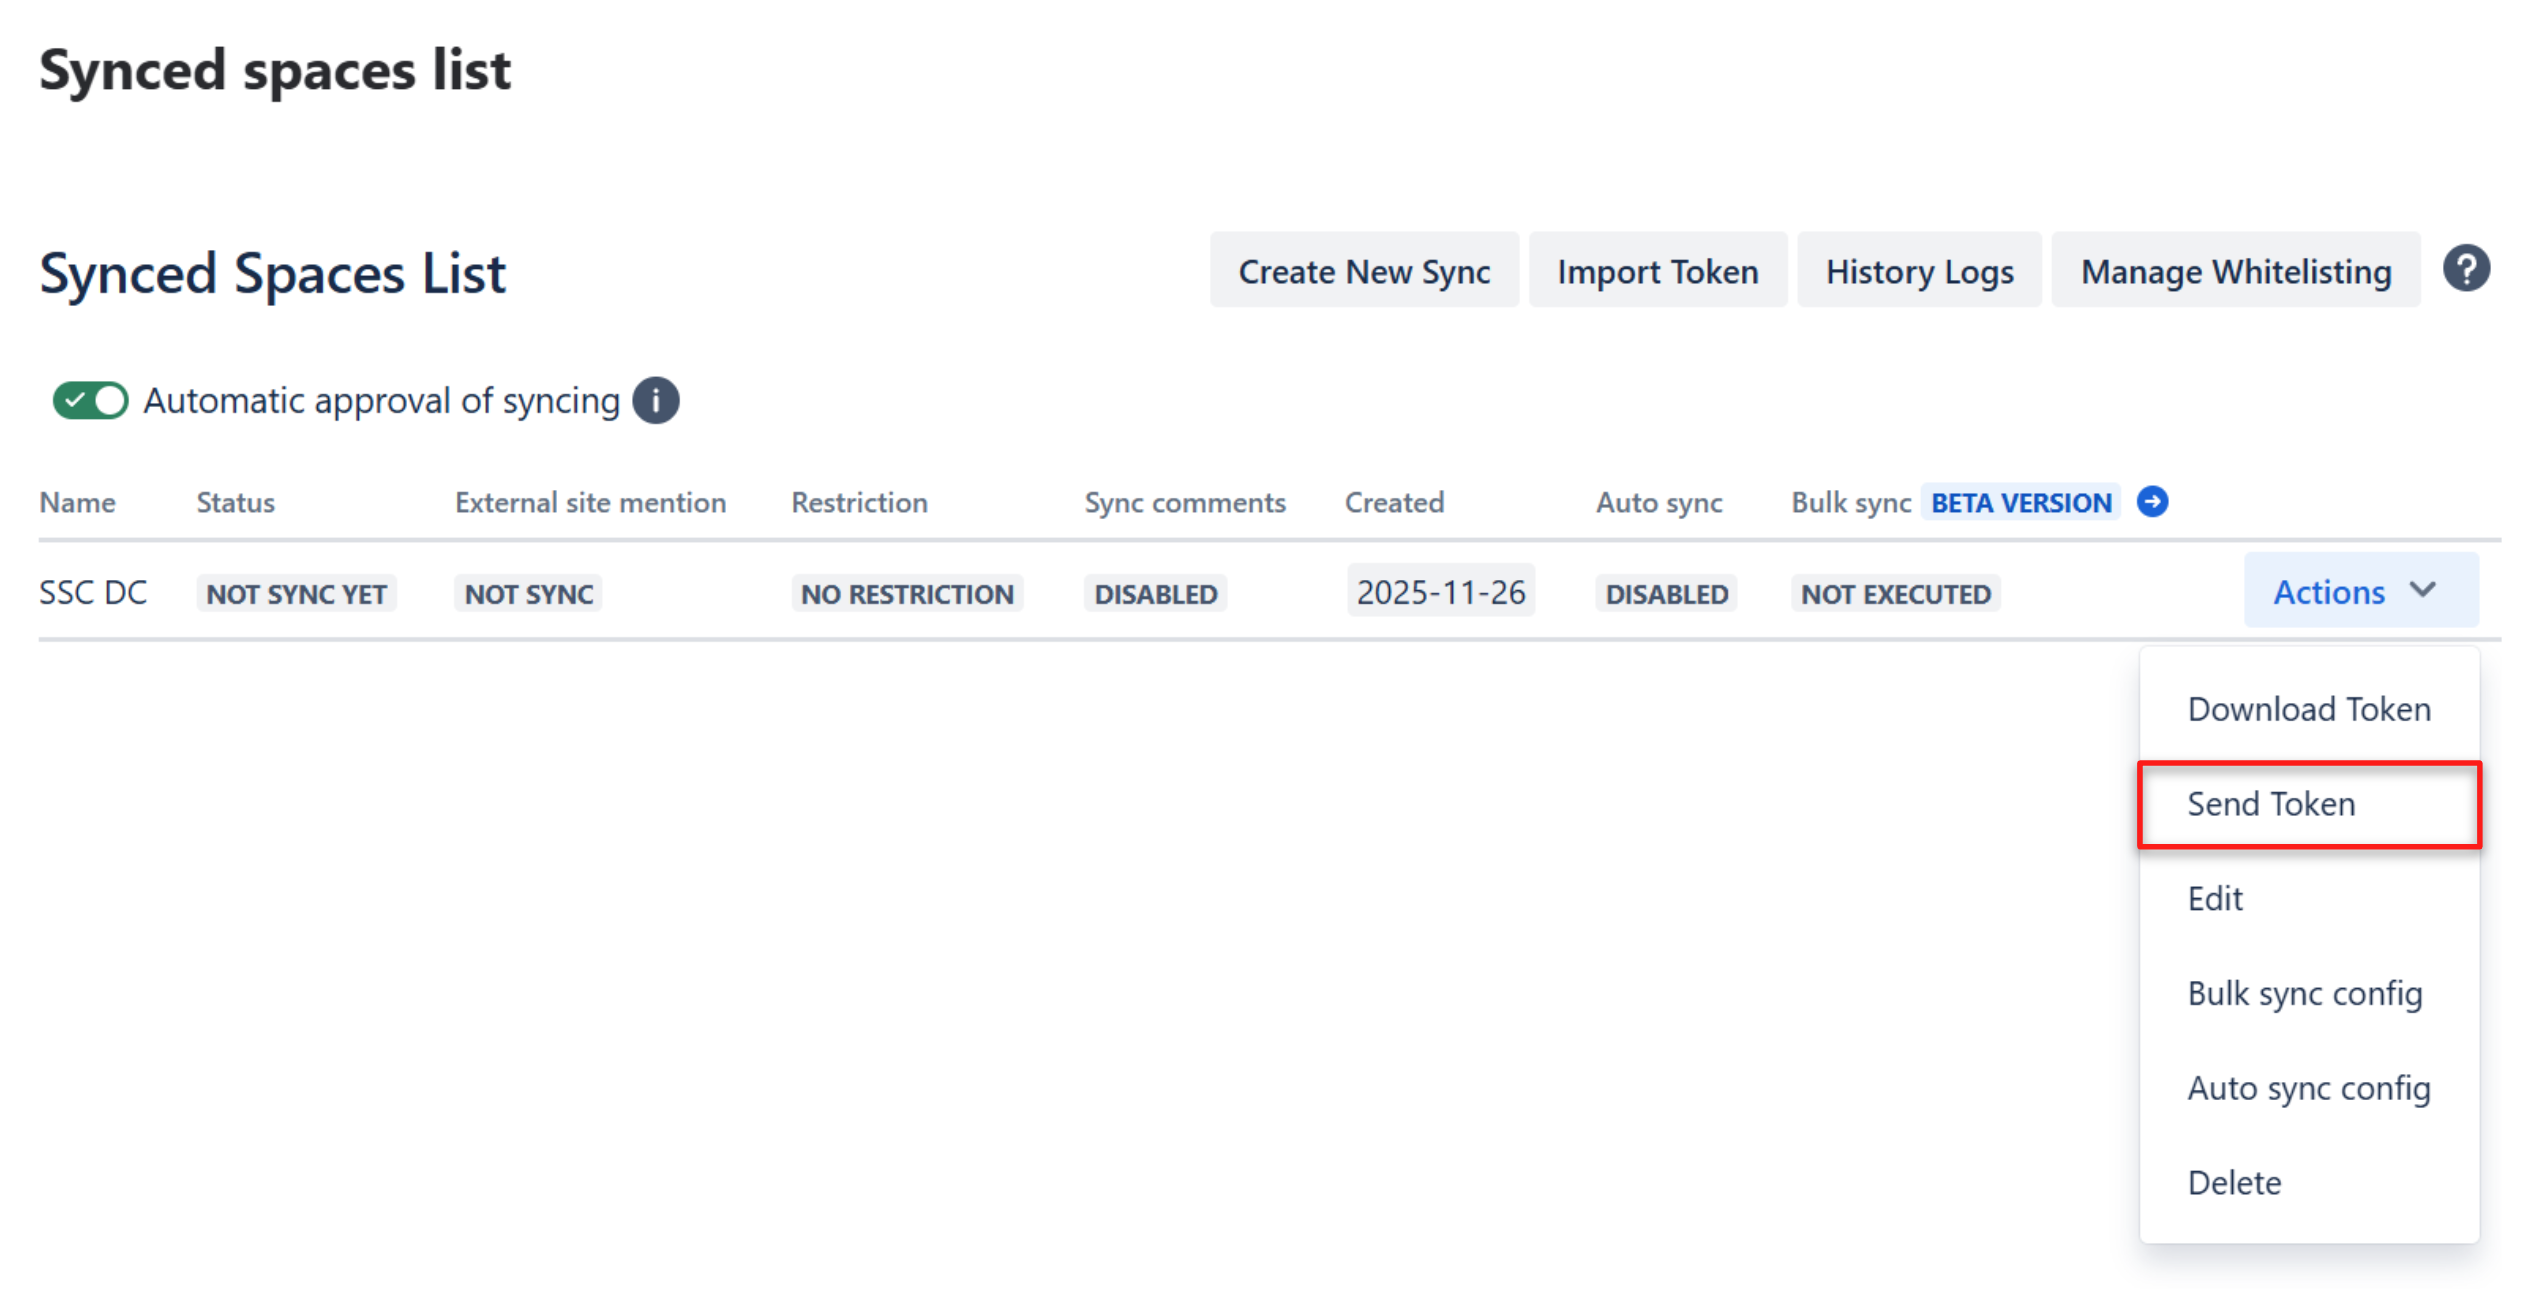
Locate the space you wish to sync with another space.
-
Click the Actions dropdown menu on its row.
-
Select Send Token.
-
Fill in the following email details:
-
Recipient Email Address
-
Email Subject
-
Email Message
-

-
Click the Send Token button
The token will be automatically attached to the email sent to the destination space admin.
Please advise the recipient to check both their Inbox and Spam/Junk folders.
Option 2: Download Token and Manually Send it
-
Locate the space you wish to sync with another space.
-
Click the Actions dropdown menu on its row.
-
Select Download Token.

-
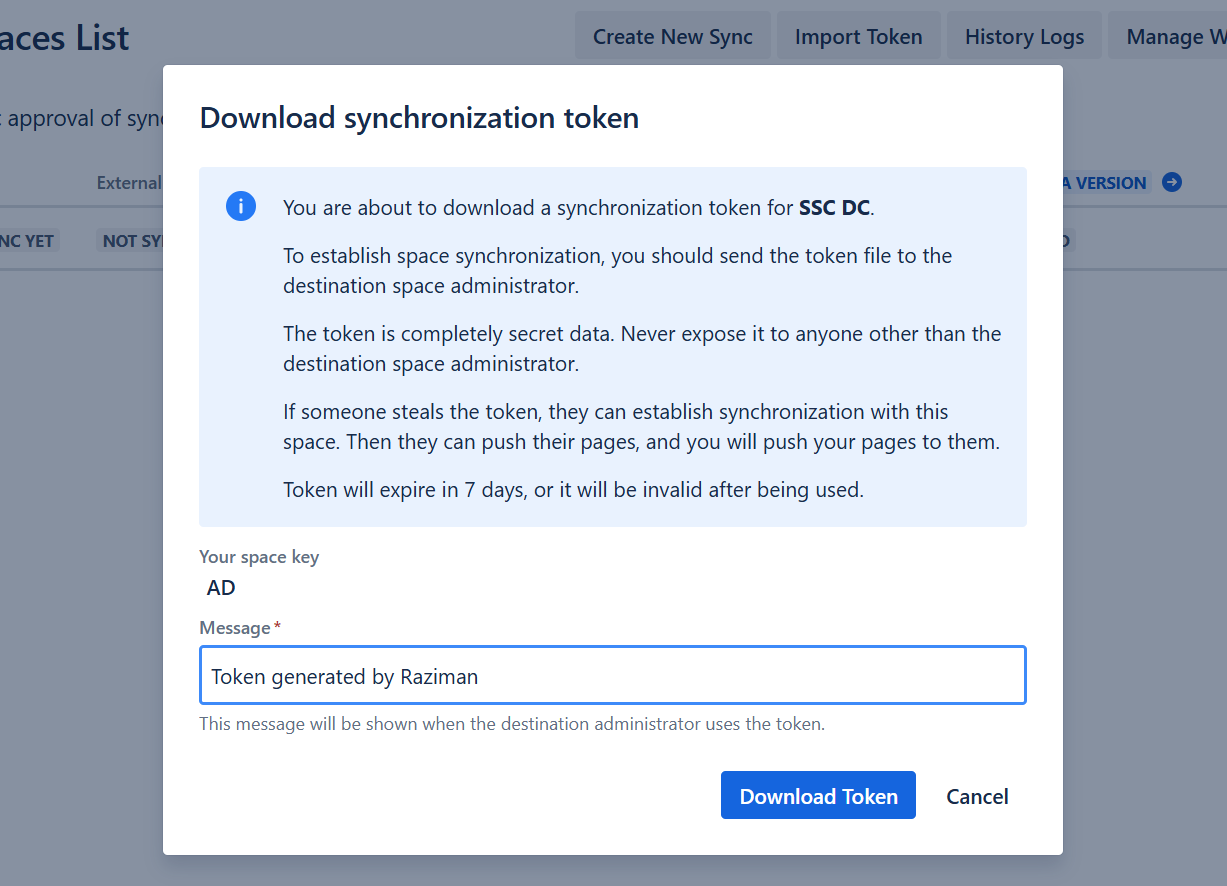
Add the Message. This message is shown when the destination administrator imports the token.
-
The token file will be downloaded to your device.
-
You can then manually send the token using your preferred method (e.g., email, chat, file-sharing service) of your choice.
-
The token is completely secret data. Never expose it to anyone other than the destination space administrator.
-
Token will expire after 7 days, or it will be invalid after being used.
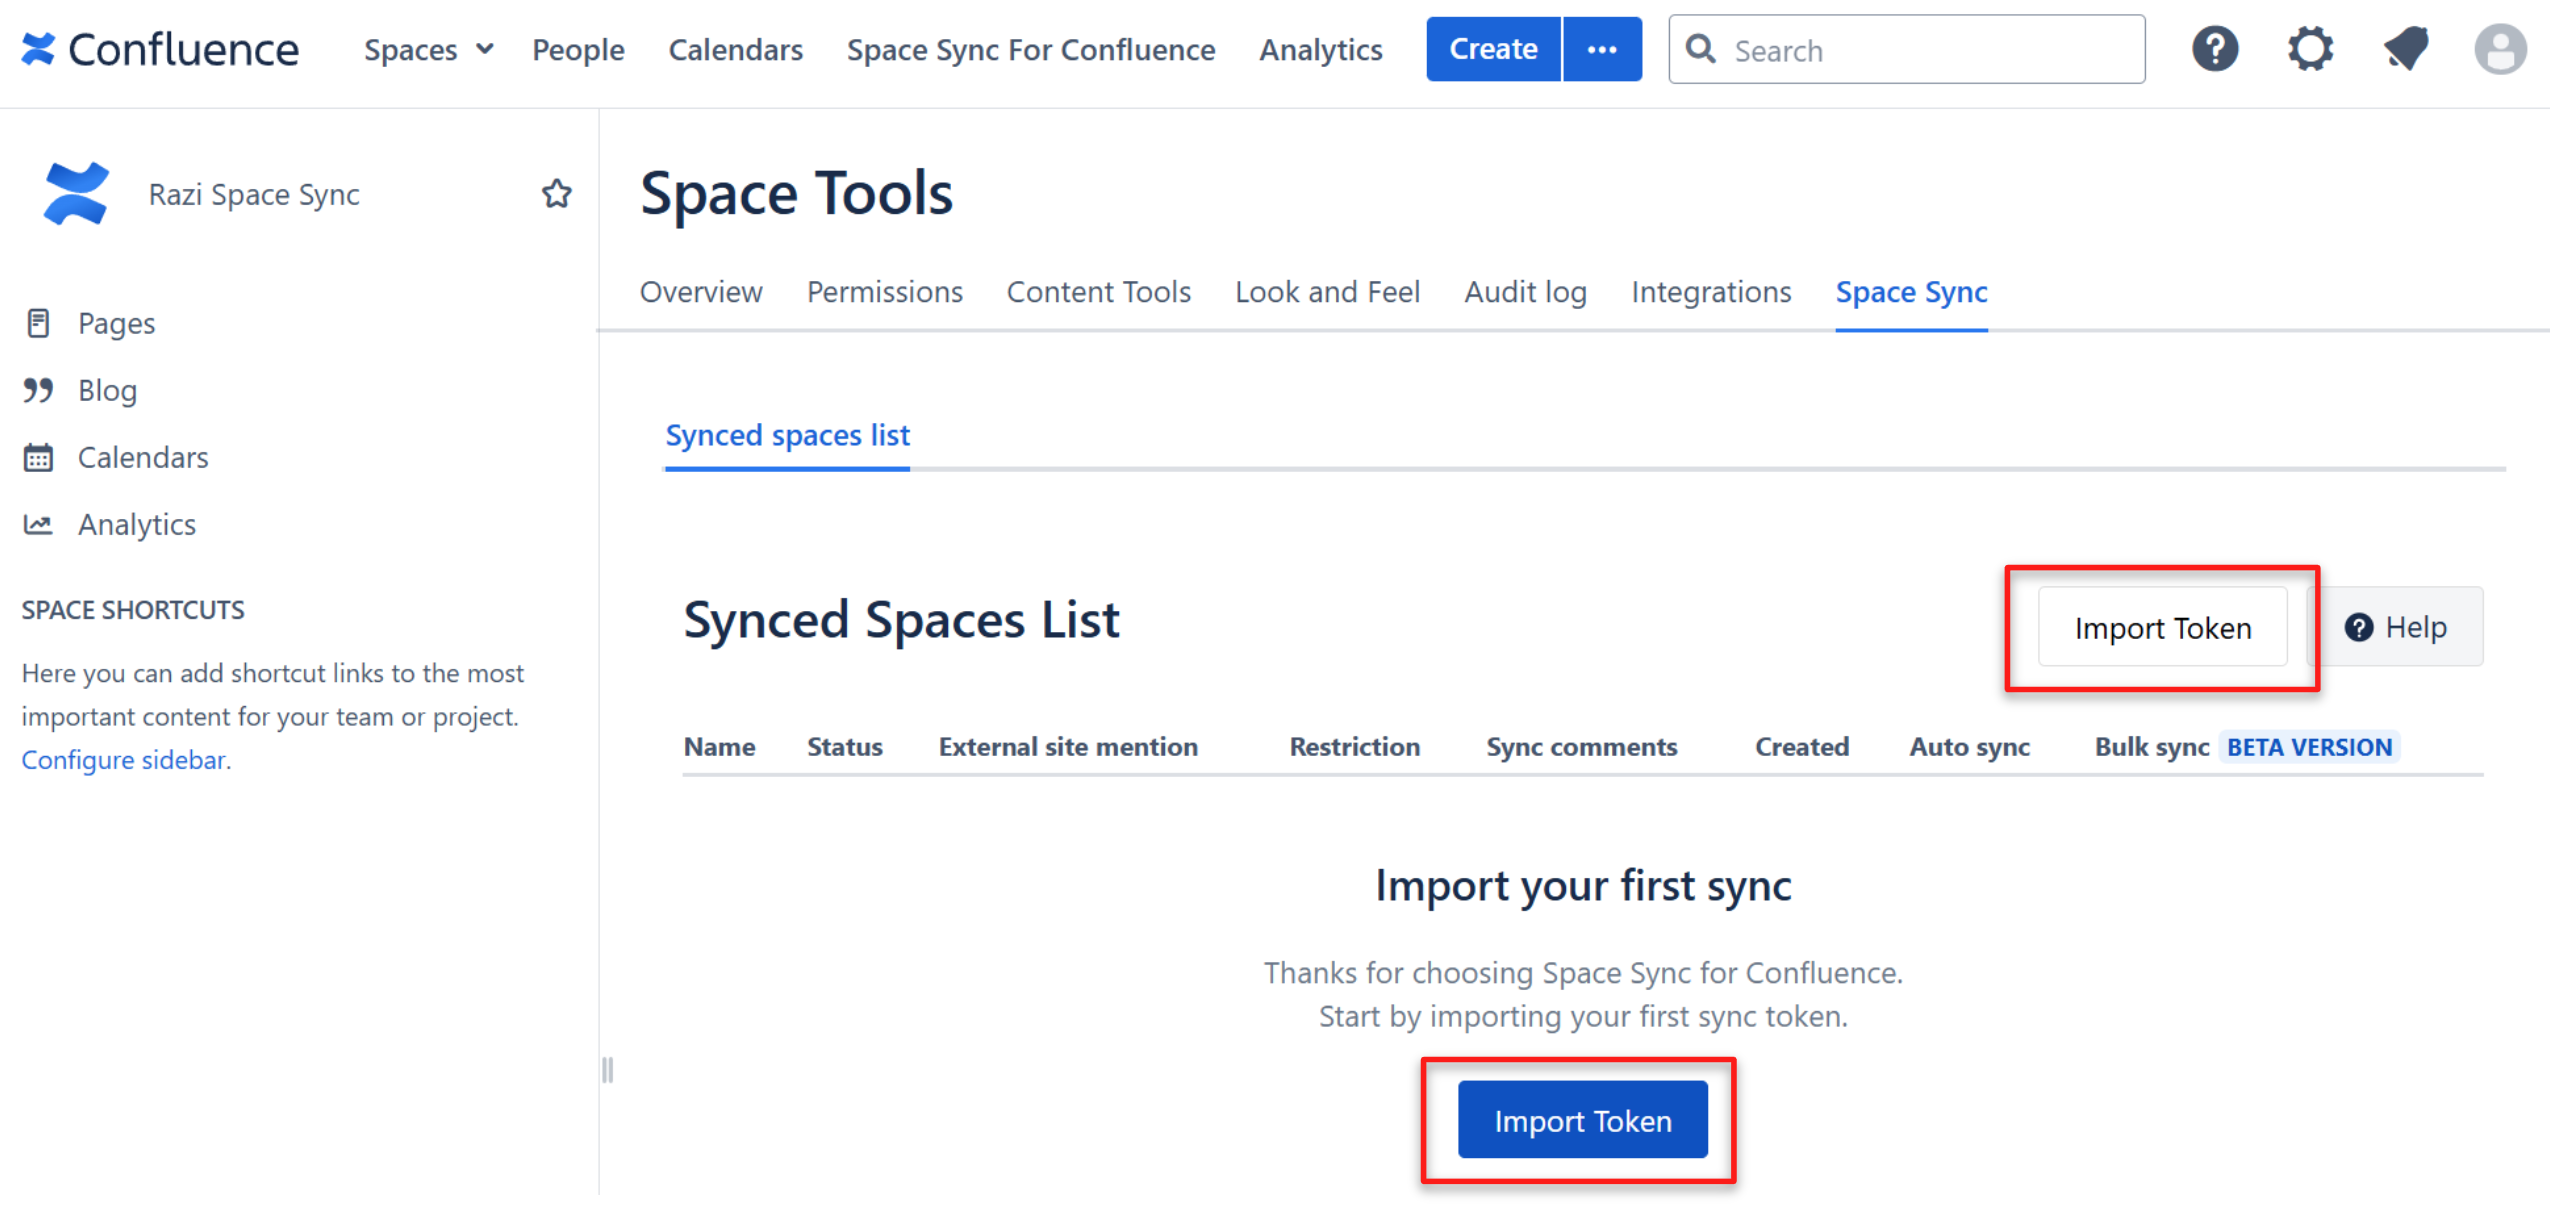
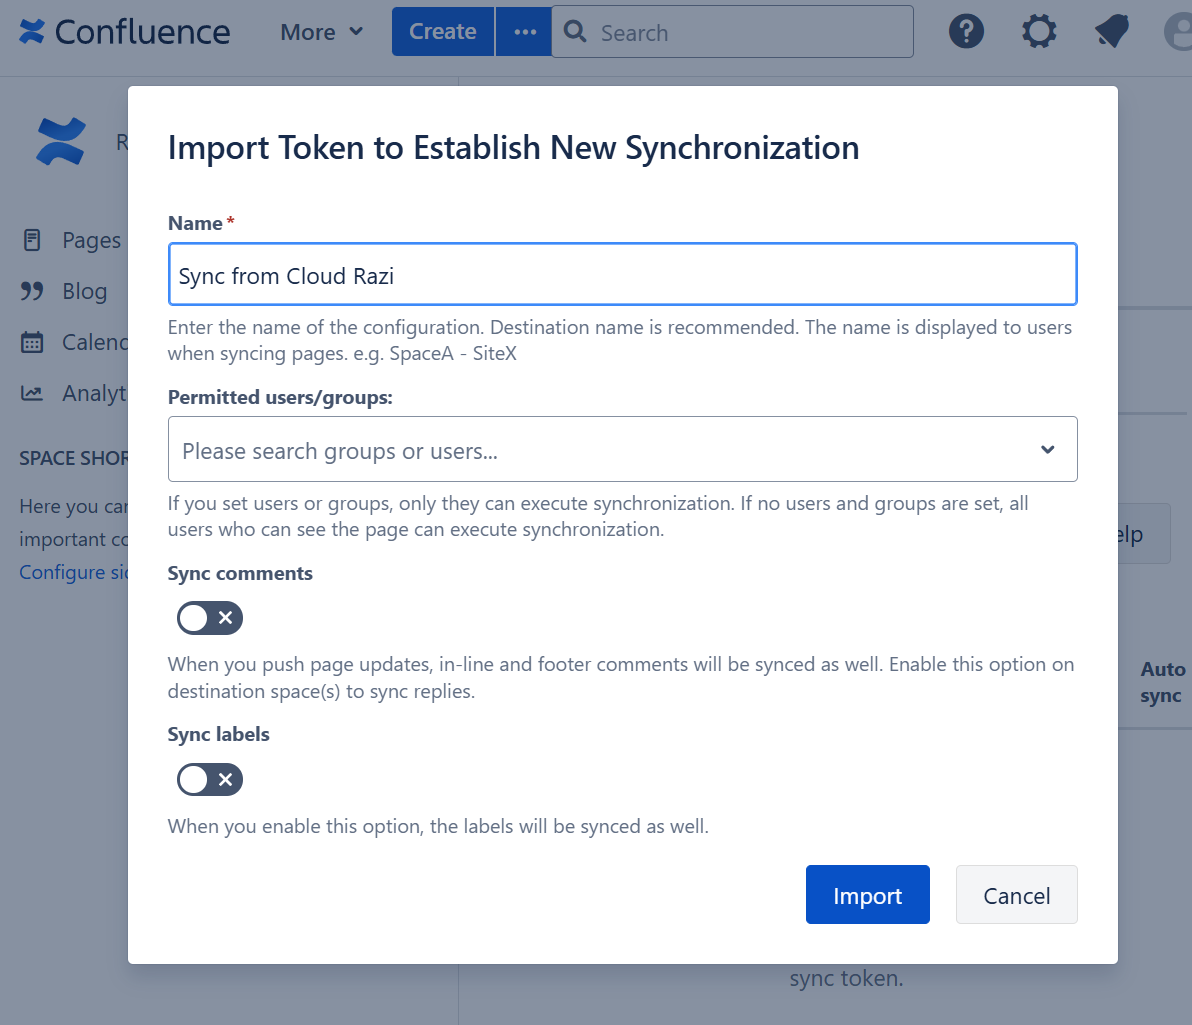
Step 3: Import the token
Navigate to your Confluence Data Center then click Space Sync for Confluence on the top menu. It will show a list of Synced Spaces that you have.
-
Click Edit sync settings
-
Click the Import Token button
-
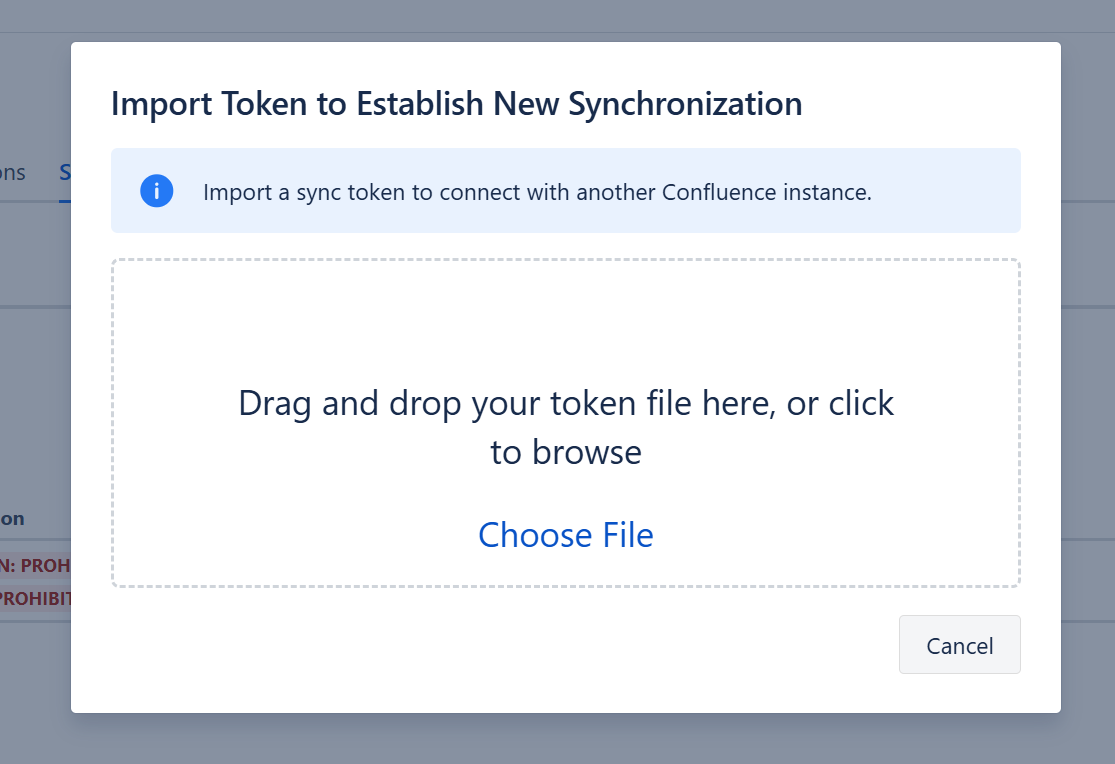
Drag and drop the sync token from the previous step
-
Enter the Name, e.g. the source space
-
Click “Import“ button
-
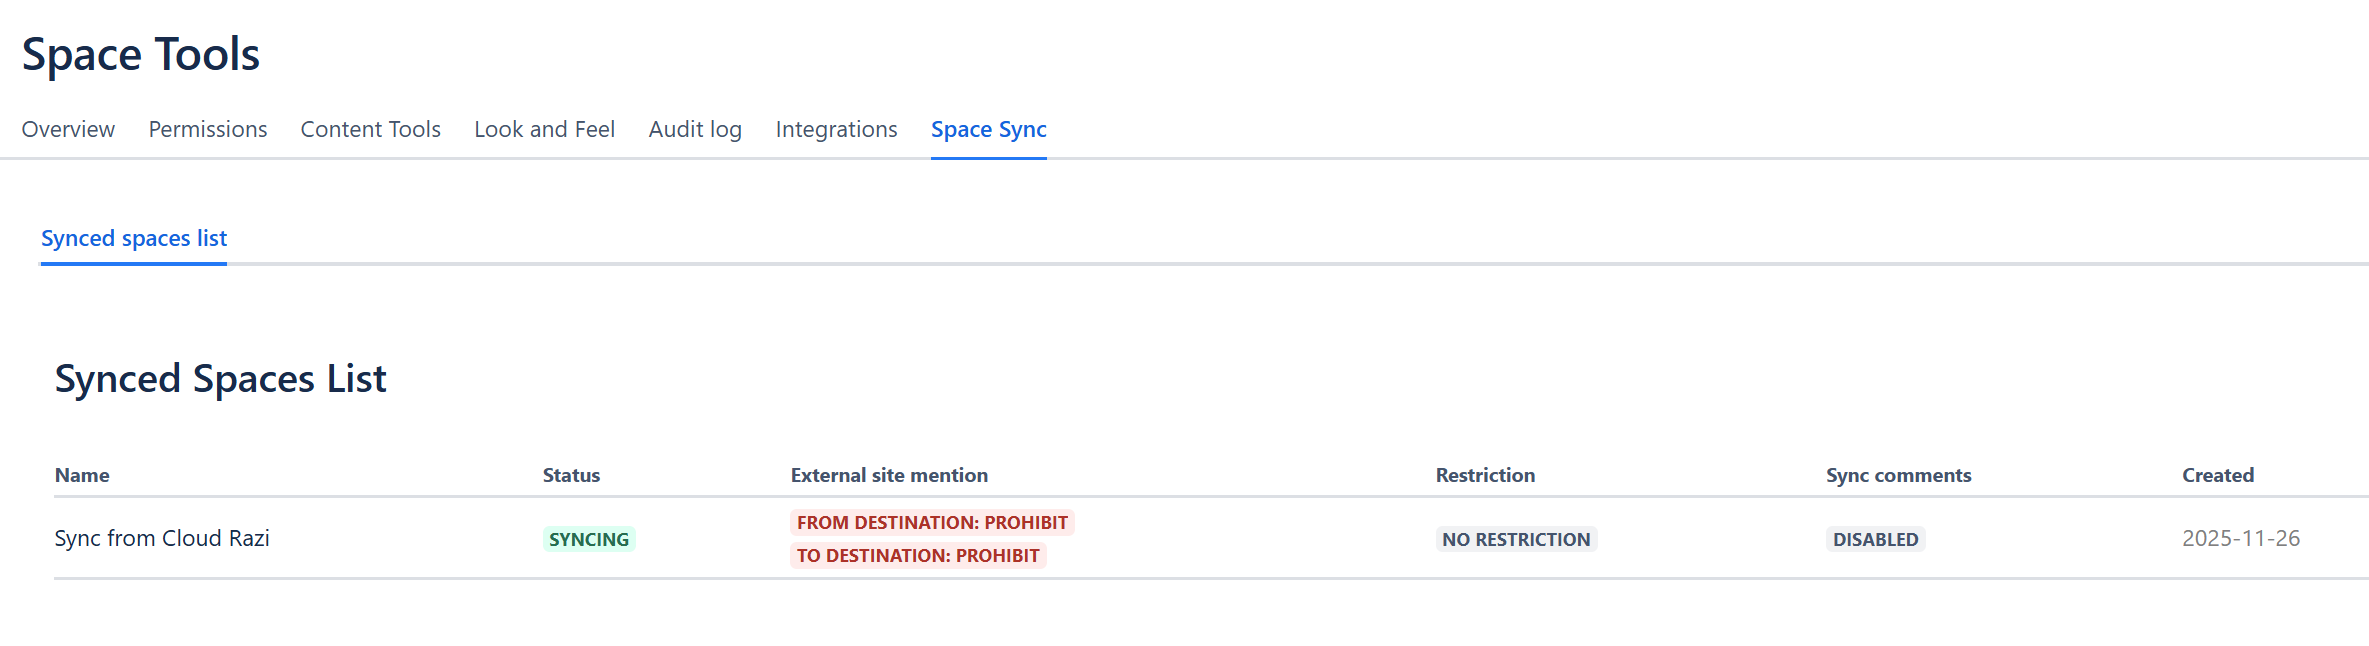
You can see a new row in the synced spaces list
Now you are ready to start syncing your page. Read more: How to sync space.