Jira Automation is very helpful for automating repetitive work and integrating Jira with other tools.
Jira Automation can’t read secure field values in a normal way since the values are encrypted. This document explains how to integrate secure custom fields with Jira Automation.
Info
Please note that Ricksoft Inc. can only provide support for the Secure Custom Fields API itself — not for Jira Automation configurations or behavior.
If you experience issues related to Jira Automation, we recommend reviewing Atlassian’s official documentation or reaching out to Atlassian Support for assistance.
Overview
The key points are to use the Web API of the app to read/write secure field values.
Jira Automation provides Send web request action. So, you can call the Web API from Jira Automation to read/write the secure field values.
Smart values supports reading values from the response and writing values to the request.
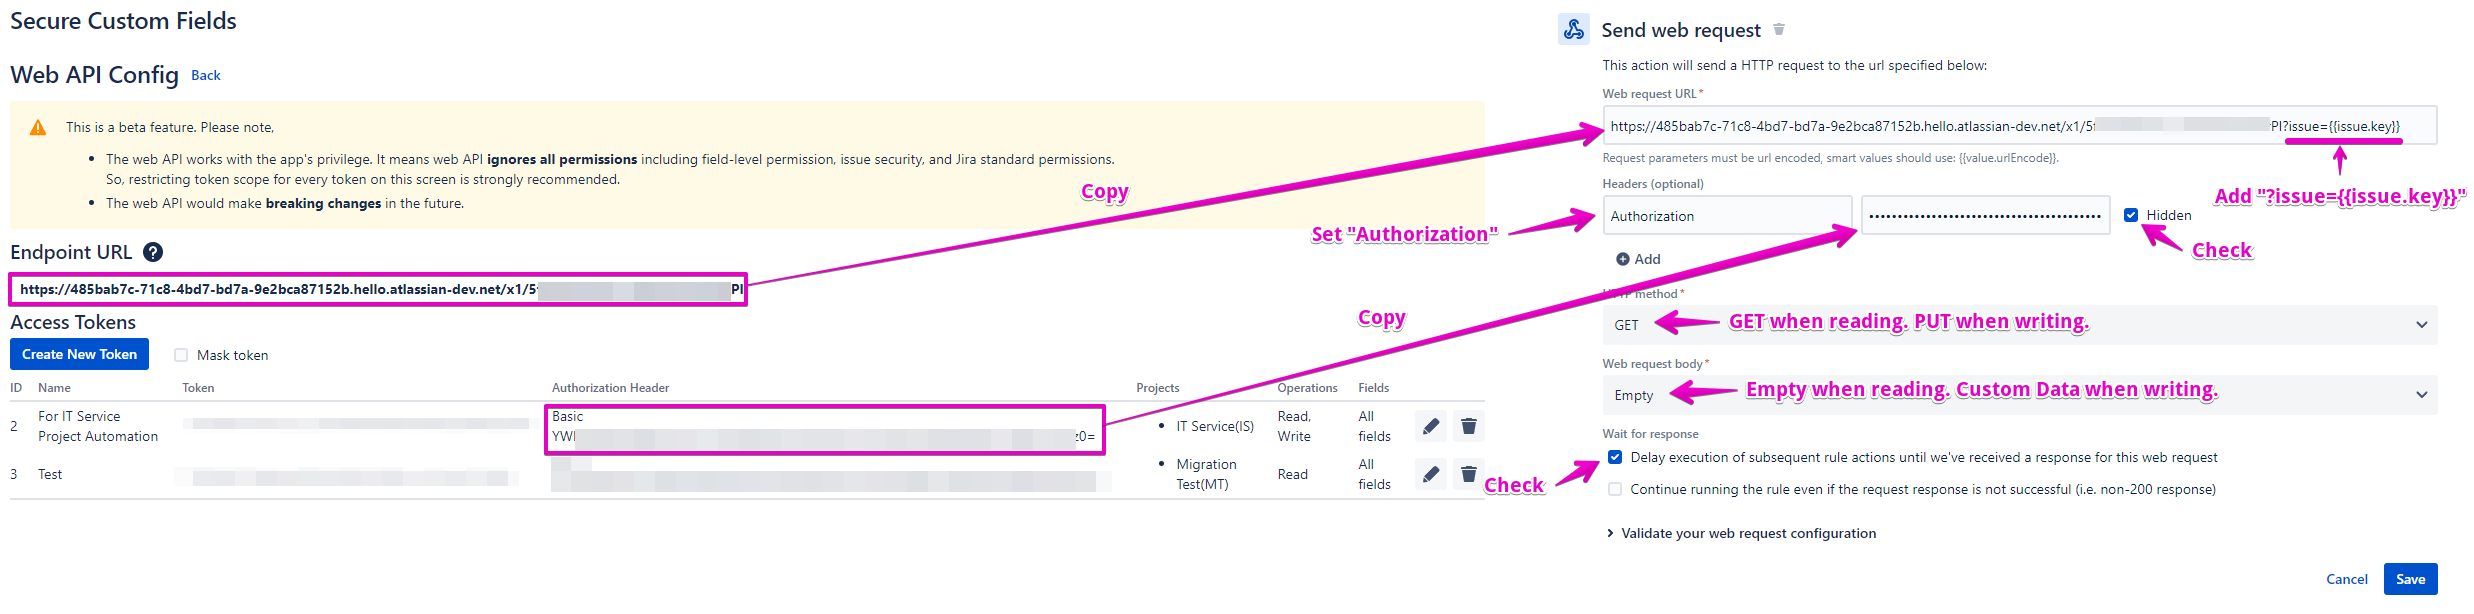
How to call the Web API from the Send web request action
-
Create a token to call the Web API.
Setting the scope of the toke is highly recommended. -
Fill out the Send web request action form as in the image below.
Tutorial video:
Examples
You can monitor your Secure Custom Field in Jira Automation to manage your fields or make the next changes you want.
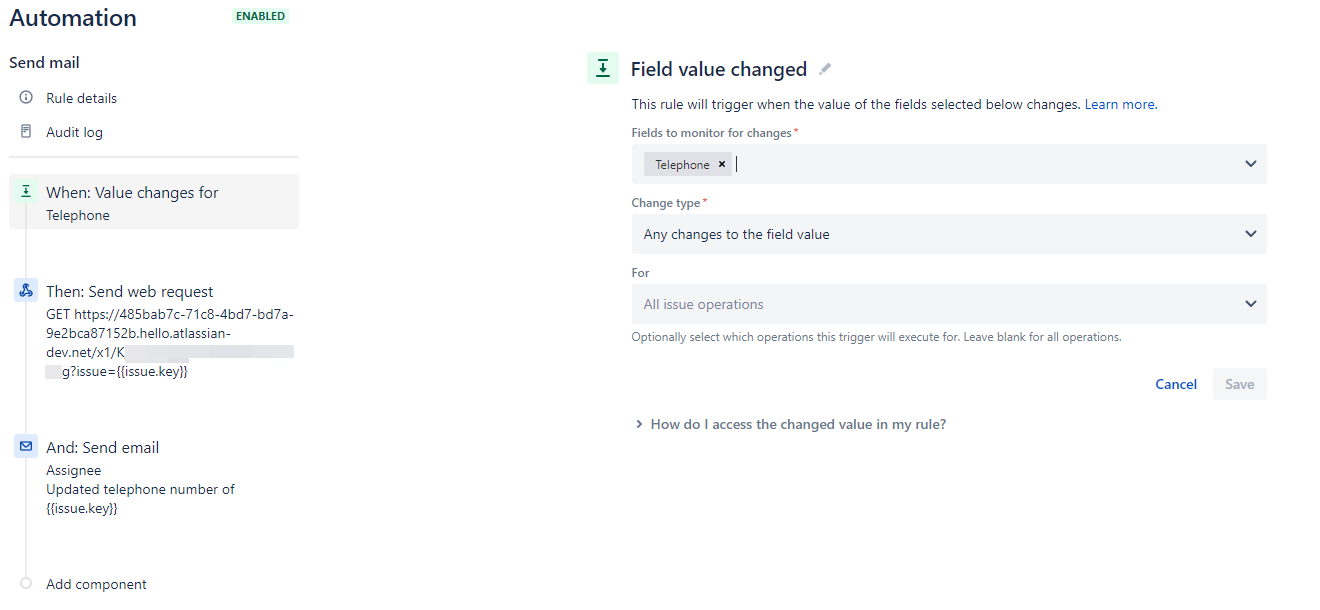
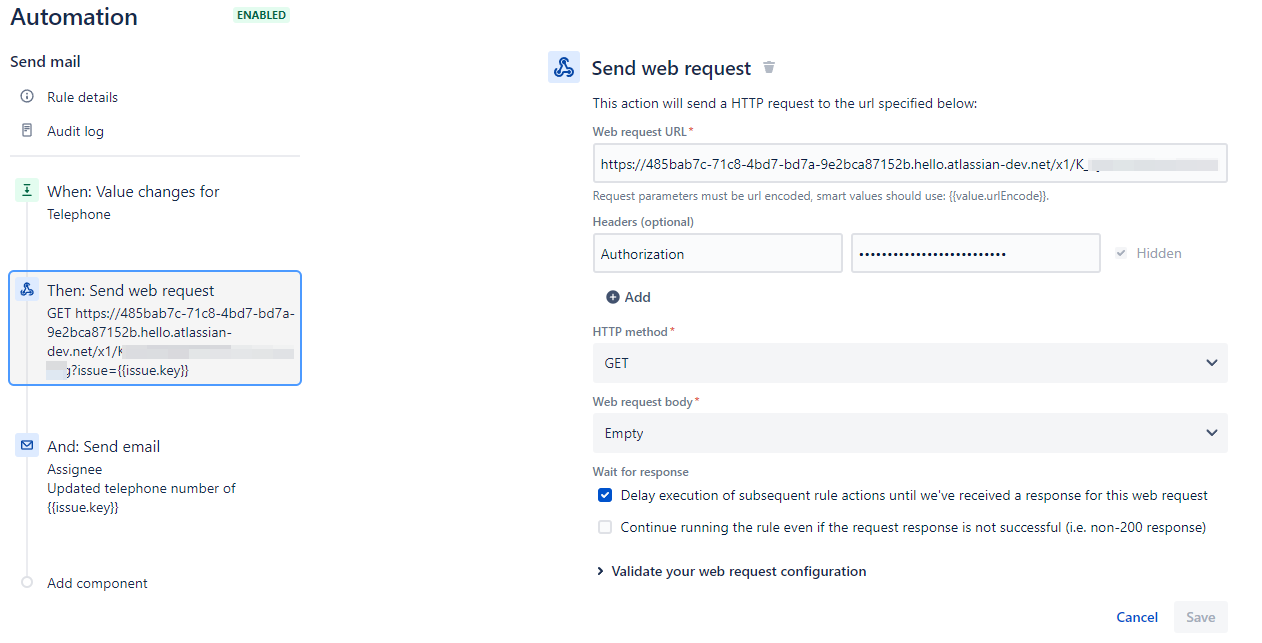
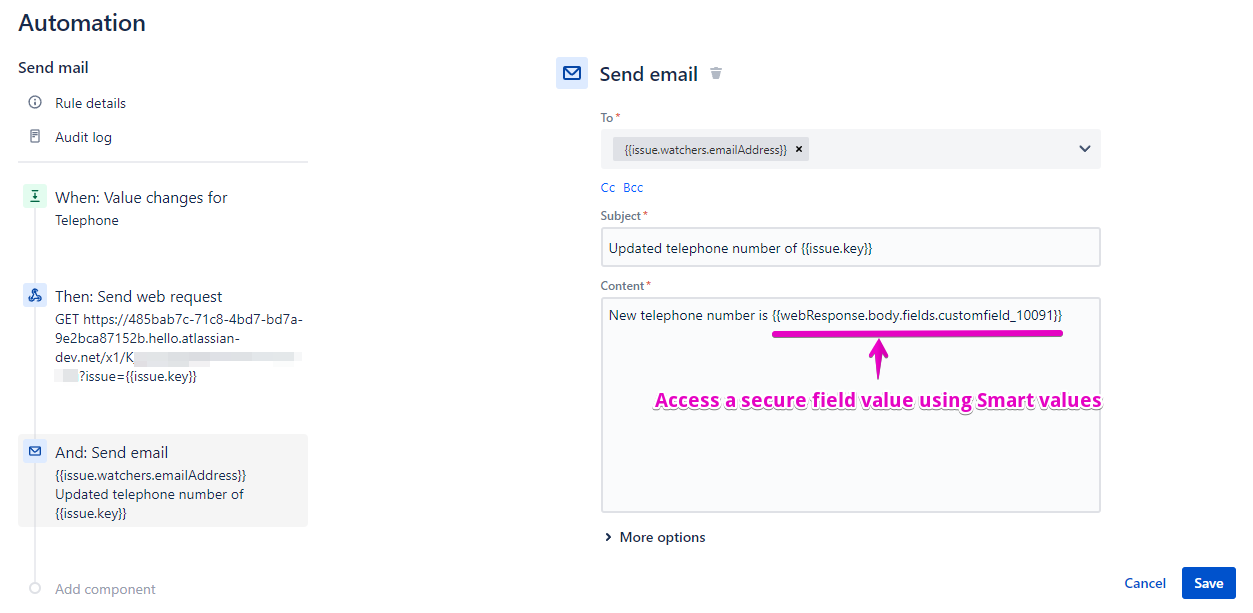
1. Send an email of a secure field value to watchers when the value is changed
2. Set secure field values when the issue status becomes In Progress
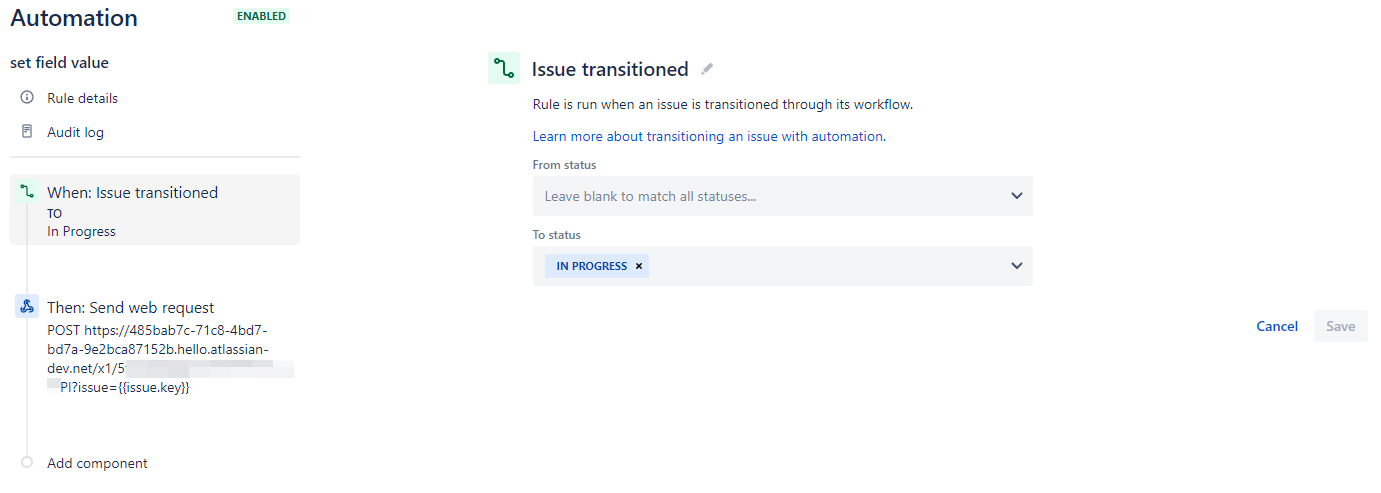
* The format of the Custom data can be found here.
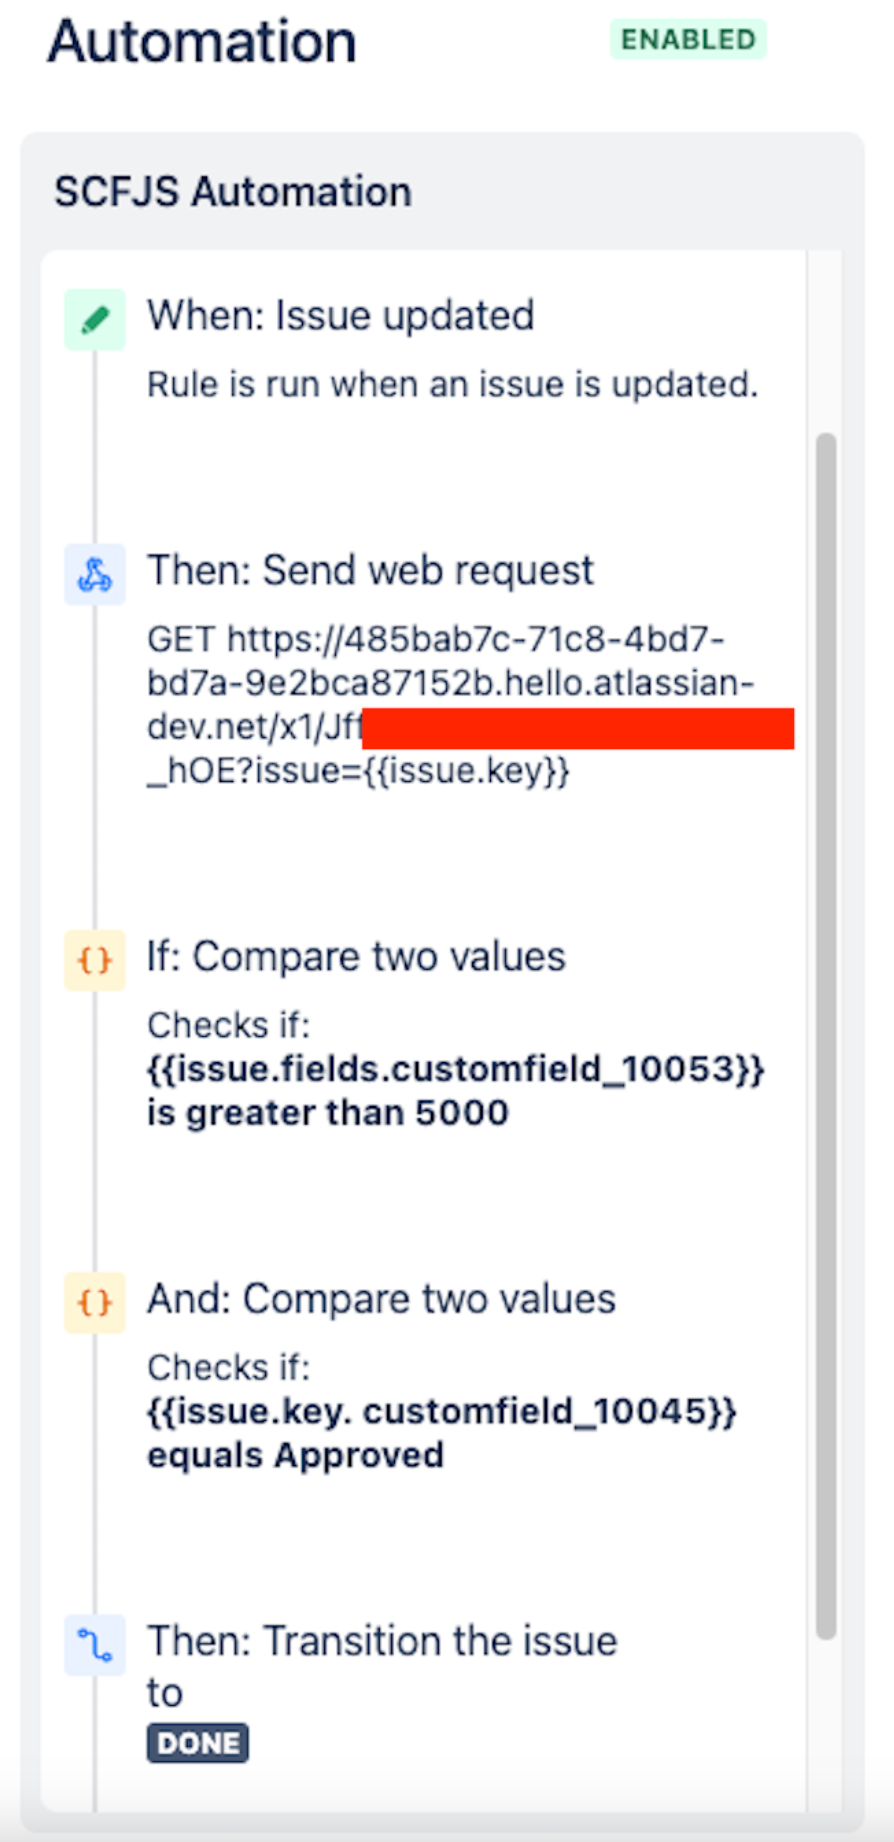
3. Transition the issue status when the secure value is updated
-
Trigger: All times the issue has been updated
-
Action: You’ll use GET web request to access the values from the issue (reminder: the Authorization key is mentioned in our documentation)
-
Condition: On If condition, you can add all the fields you want to check, and this validation will be triggered at all times the issue has been updated.
-
Finally, the action you want to do - in this case, transition the issue to another status - you can edit other Secure Custom Fields as well
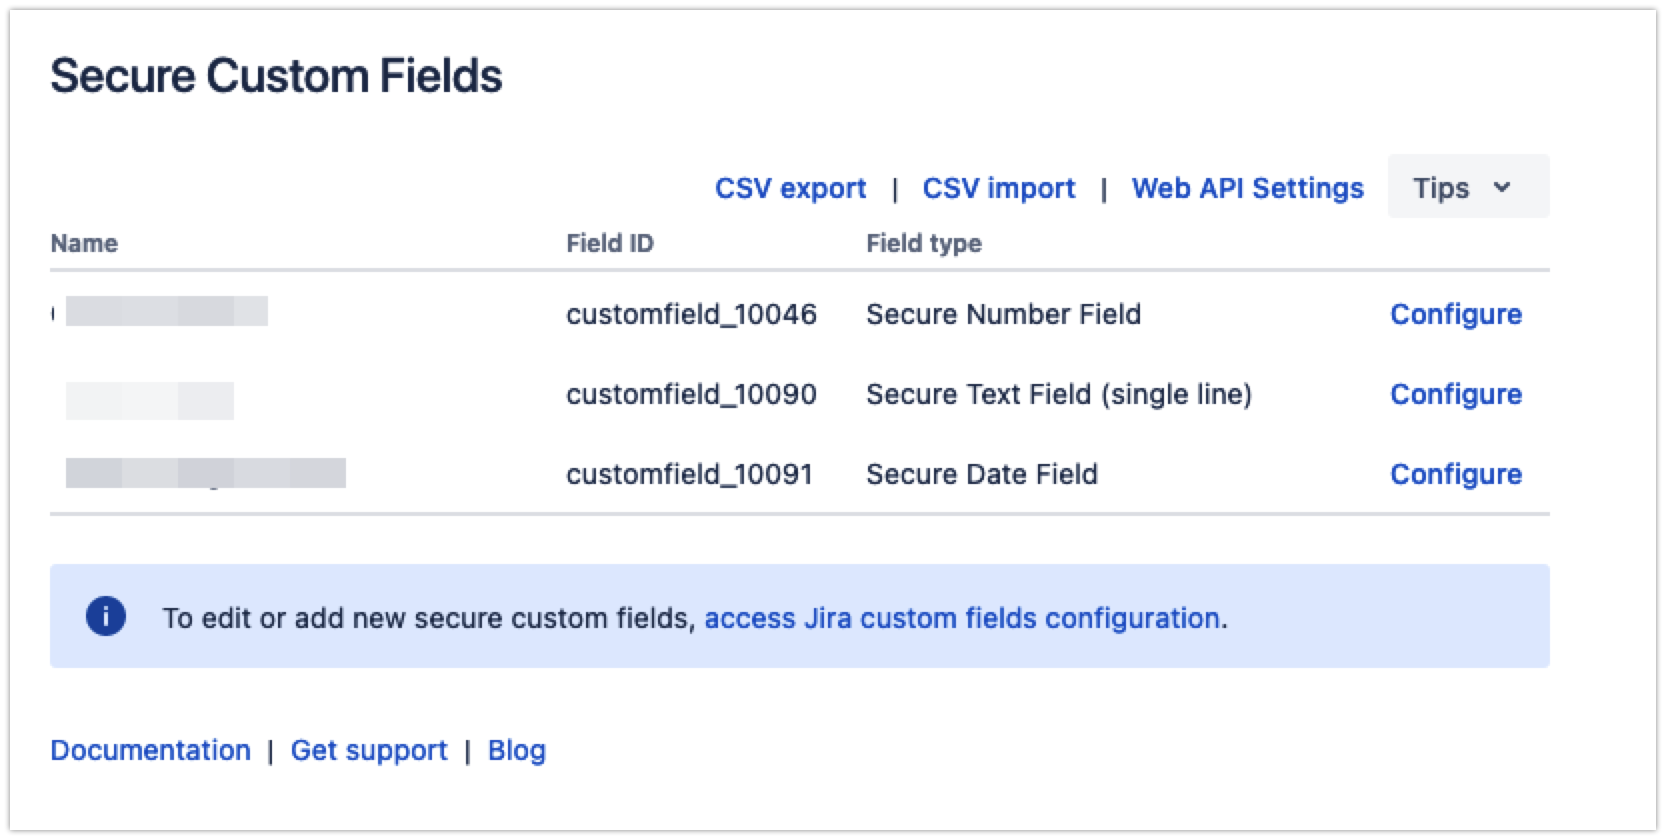
An important point here is to get the ID from the custom field that you want to monitor:
-
Open the app from the Apps menu
-
Click Configure secure custom fields
-
You can copy the ID from the Field ID column:
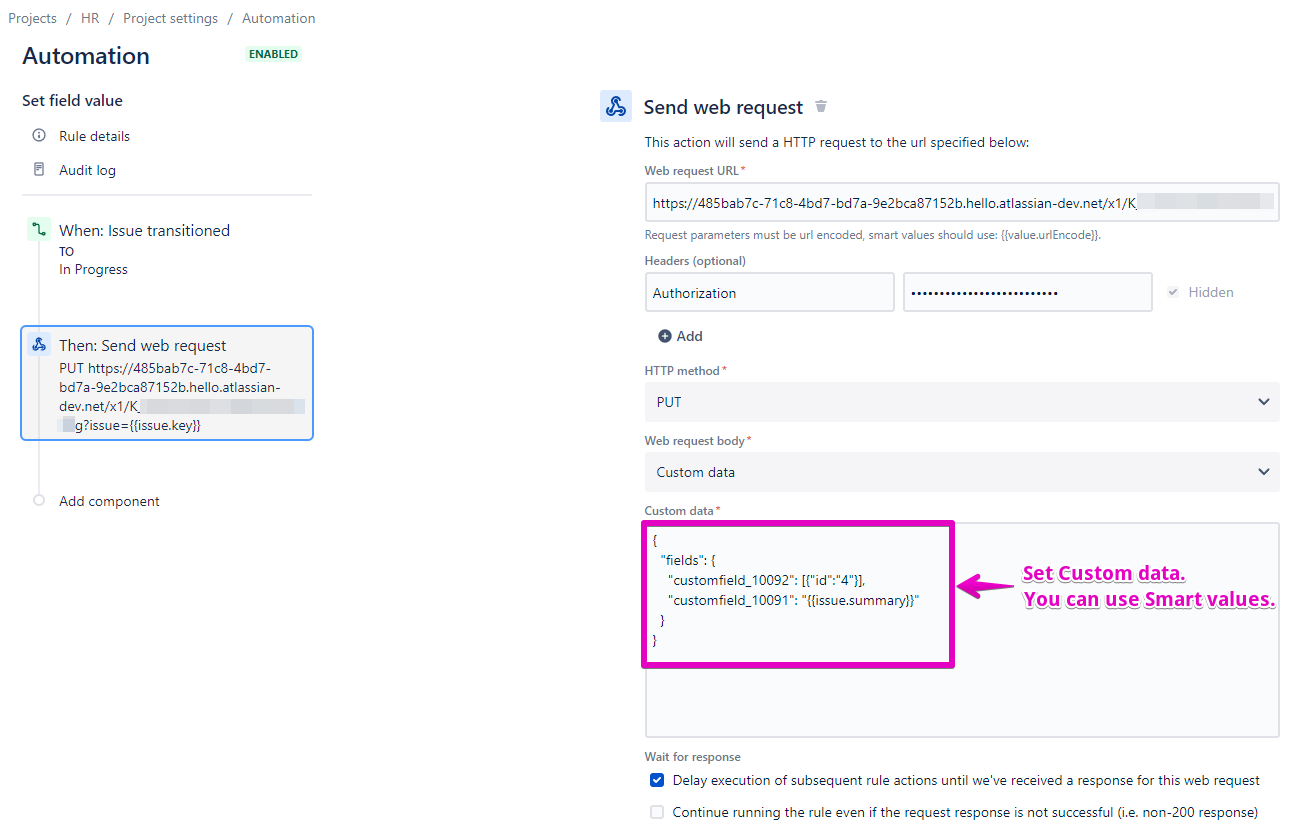
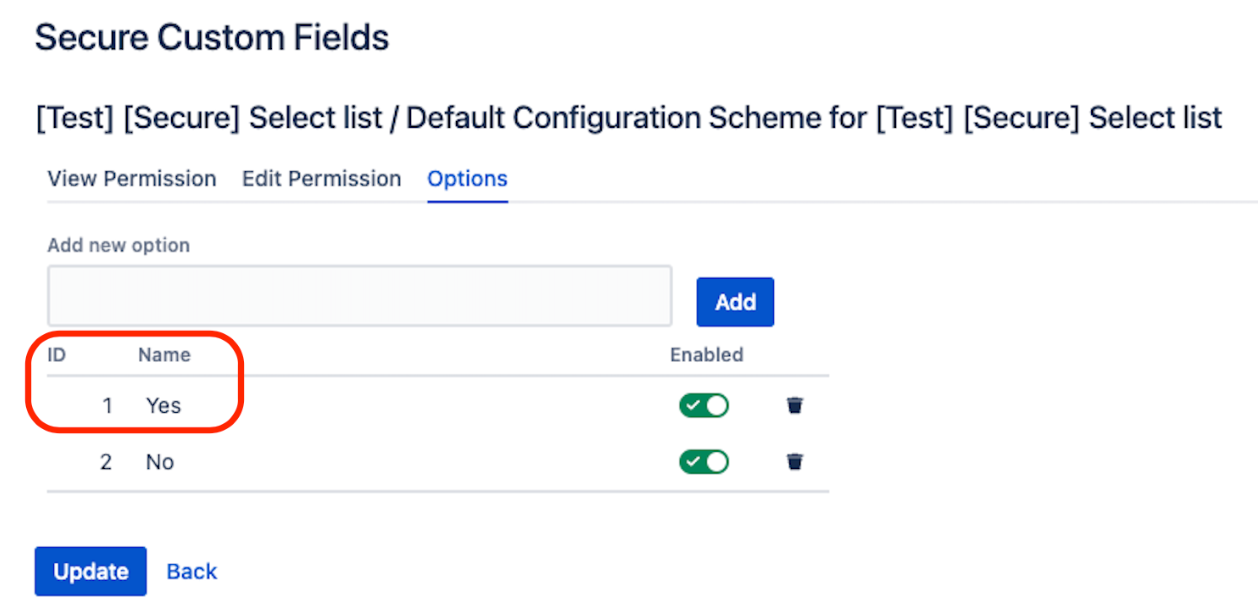
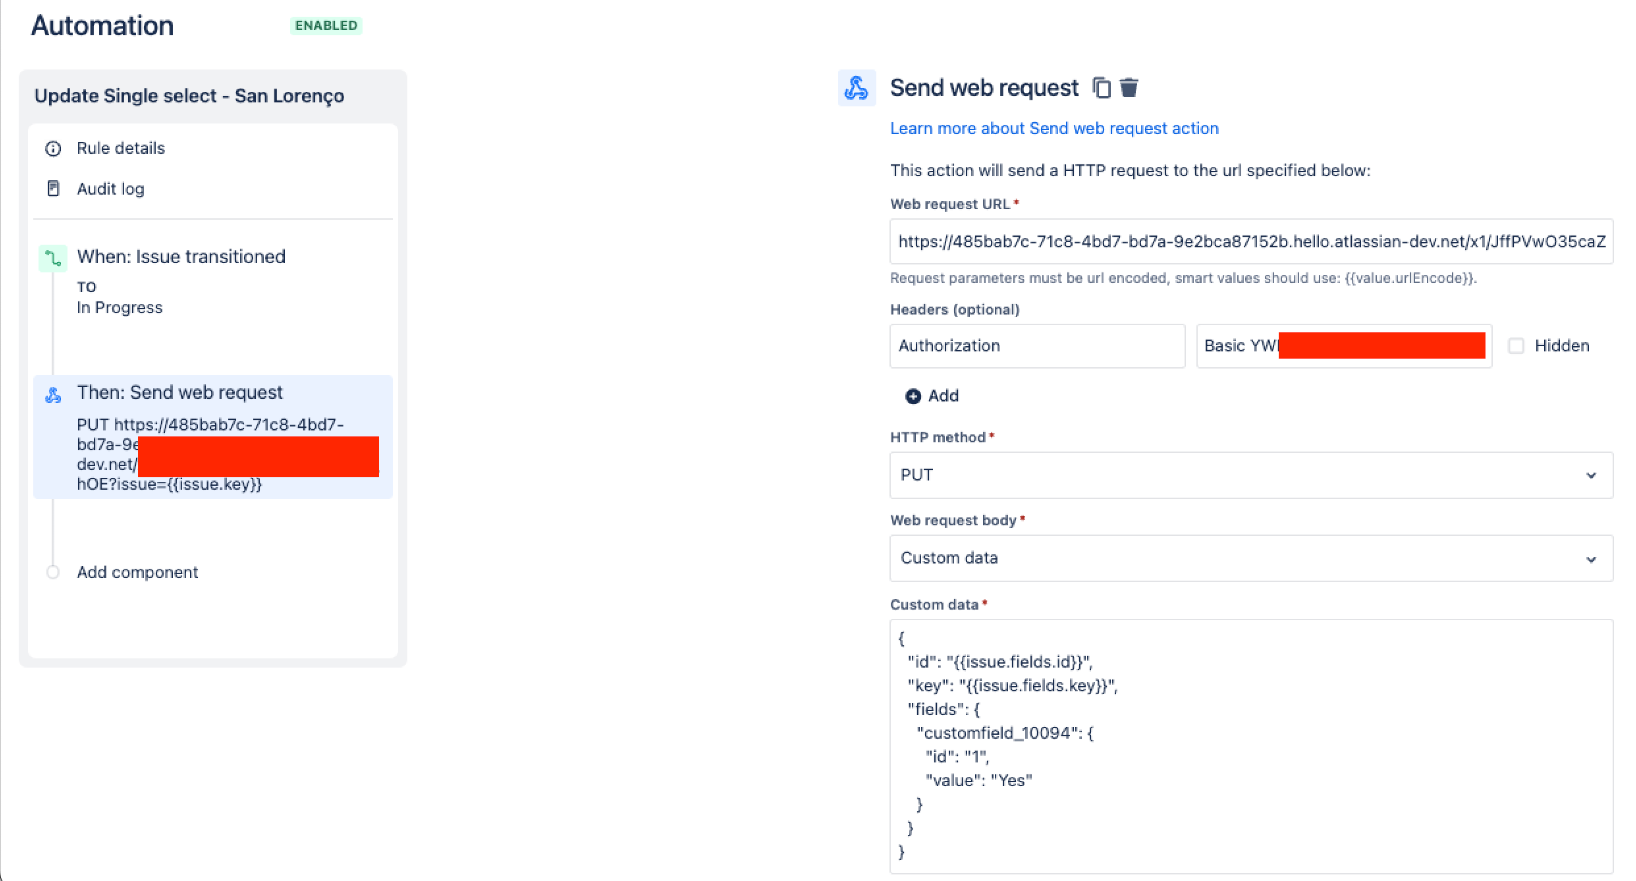
4. Update the value of the Secure Select List (single-choice)
First, open the Secure Custom Fields app to get the customfield_id, for example, it will be the customfield_10094 in this case:

Then, click on Configure > Options, and then take note of the ID and the value you want to change. In this case, it will be the ID “1” with value “Yes”
Create your automation:
-
Web request URL: Create it at Web API from the app. You can refer to how to create it here: Web API
-
Headers: Authorization
-
Value: Your Authorization Header
-
HTTP method: PUT
-
Web request body: Custom data
-
Custom data: {
"id": "{{issue.fields.id}}",
"key": "{{issue.fields.key}}",
"fields": {
"customfield_10094": {
"id": "1",
"value": "Yes"
}
}
}
*Please replace the Custom data code with your own data