The Cell to Jira Field Mapping function lets you update Jira field values directly from your table. You can either enter values manually or use Excel-like formulas to automate updates. This helps reduce manual work and keeps your table and Jira in sync.
Steps to create

Creating a Cell to Jira Field Mapping
-
Open the Jira Field Mapping Dialog
-
Right-click on a specific cell in the table.
-
Select Jira Field Mapping from the context menu.
-
-
Configure the Mapping
-
Choose Cell to Jira Field as the mapping direction.
-
Select a target Jira field from the dropdown list.
-
(Optional) Enter a formula in the provided box if calculations are required before updating the Jira field.
-
-
Confirm the Mapping
-
Click Add Mapping to save the configuration.
-
The mapped cell will now update the Jira field when changes are made and saved.
-
Two Approaches to Writing Data
1. With Formula
-
Requires users to enter a formula in the provided box when creating the Jira field mapping.
-
Once a formula is applied, the input controls (such as dropdowns for select lists) are disabled because the formula dynamically overwrites the field's value.
-
Useful for automating field updates based on calculated values in the spreadsheet.
-
When creating a Cell to Jira Field with formula, the input controls will be disabled
2. Without Formula
-
Users manually input values into the table cell, which are then pushed to the mapped Jira field.
-
Standard input controls (such as select lists) remain available for fields that support predefined options.
When Does Data Update?
-
When a mapped cell is modified: Any changes made to the table cell will be queued for update.
-
When the table is saved: The updated values are sent to Jira, updating the corresponding fields.
Supported Fields
-
Text Field
-
Number Field
-
Multi Select
-
User Fields
-
Priority Field
-
CheckBox Field
-
RadioButton Field
-
Labels Field
Examples
Text Field
Example: Auto-generate a project description based on department and month.
Excel Formula:
="Department: " & B2 & " - Report for " & TEXT(C2, "MMMM YYYY")
Description:
If B2 = "Finance" and C2 = "01/01/2024", the "Text Field" will store "Department: Finance - Report for January 2024" into the Jira field.
Notes:
-
Ensure all text values in Excel formulas are enclosed in double quotes ("").
-
Keep text within Jira’s character limit.
Number Field
Example: Calculate the total budget for an event based on cost per attendee.
Excel Formula:
=B2 * C2
Description:
If B2 = "50" (Attendees) and C2 = "20" (Cost per person), the "Number Field" will store "1000" as the total budget.
Notes:
-
The field only accepts numeric values.
-
Ensure calculations return a valid numerical output.
Single Select Field
Example: Assign a department based on the selected value in "A2".
Excel Formula:
=IF(A2="HR", "Human Resources", IF(A2="IT", "Information Technology", "Finance"))
Description:
If A2 = "HR", the "Single Select Field" will store "Human Resources".
Notes:
-
All text values in formulas must be enclosed in double quotes ("").
-
The value must exactly match one of the predefined options configured in the plugin.
-
If the mapped value does not exist in the dropdown, Jira will reject it.
User Fields (Assignee, Reporter, Custom User Fields)
Example: Assign a default user based on department.
Excel Formula:
=IF(A2="Finance", "jsmith", IF(A2="IT", "tjackson", "admin"))
Description:
If A2 = "Finance", the "User Field" will be set to "jsmith".
Notes:
-
The plugin only supports usernames, and must be enclosed in double quotes ("") in formulas.
-
Ensure the username exists in Jira before mapping.
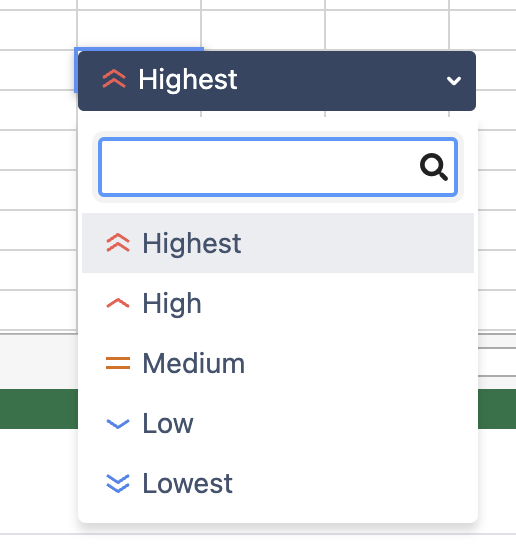
Priority Field
Example: Assign a priority level based on impact severity.
Excel Formula:
=IF(A2>8, "Highest", IF(A2>5, "High", IF(A2>3, "Medium", "Low")))
Description:
If A2 = "9", the "Priority Field" will store "Highest".
Notes:
-
All priority values must be written in double quotes ("") in the formula.
-
The value must exactly match one of the predefined priority options configured in the plugin.
-
If the priority list contains "Highest, High, Medium, Low", any other value will be rejected.
Sample: Automatically Calculate and Update Estimated Cost in Jira
Setup:
-
You have a table that calculates the estimated cost of a project based on different factors.
-
The estimated cost should be automatically updated in a Jira custom field called "Estimated Cost" whenever the table is saved.
Steps:
-
Map a cell (e.g., C5) to the Jira "Estimated Cost" field.
-
Enter the following formula in C5:
=B10 + (B12 * B7) + (B13 * B7)-
B10: Base cost
-
B12: Number of hours
-
B7: Hourly rate
-
B13: Additional expenses
-
-
Once mapped, every time you update values in B10, B12, B7, or B13, the formula recalculates the cost, and the updated value is pushed to Jira when the table is saved.
Bonus: Using a Jira Field as Part of the Formula
-
You can also use a Jira field to Cell Mapping as an input for your formula.
-
Example: If Priority affects the cost (e.g., "High" priority increases the cost by 20%), you can first map the Priority field to a cell (e.g., D2), then use a formula like:
=B10 + (B12 * B7) + (B13 * B7) + IF(D2="High", B10*0.2, 0)-
If the priority is set to "High" in Jira, the cost increases by 20%.
-
The final calculated value is then pushed to Jira’s "Estimated Cost" field.
-