Configuring job scheduler settings
-
Log in as a user with the Jira System Administrators and Jira Administrators global permission.
-
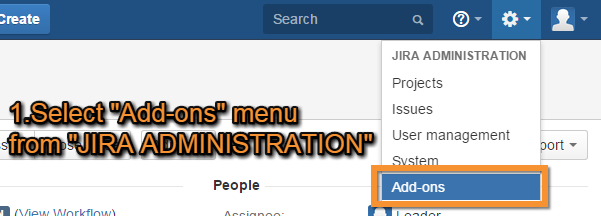
Select Add-ons from the Jira ADMINISTRATION menu shown as the cog icon at the top-right corner.
-
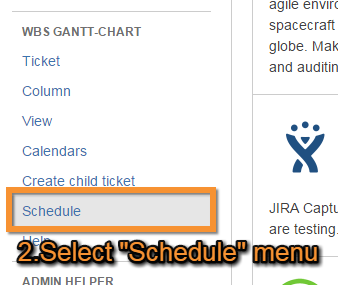
Select Job scheduler from the WBS GANTT-CHART section on the side menu.
Job scheduler
Job scheduler is the generic name for the feature which carries out aggregate calculation processes at fixed times according to the issue tree structure displayed in WBS Gantt-Chart.
Job
A job is a series of aggregation processes that are carried out at fixed times. A job consists of one or more tasks carried out in a defined order.
Configure the settings as shown below.
|
Item |
Required |
Description |
|---|---|---|
|
Name |
|
Name of job |
|
Project or Filter |
|
Project or filter used for searching for issues to be updated |
|
User |
|
The user searches for issues or executes the job |
|
Interval |
|
The intervals related to executing jobs
|
|
Sleep (seconds) |
|
The number of seconds' pause after a certain number of issues have updated
|
|
Status |
|
Job status: Enabled / Disabled
|
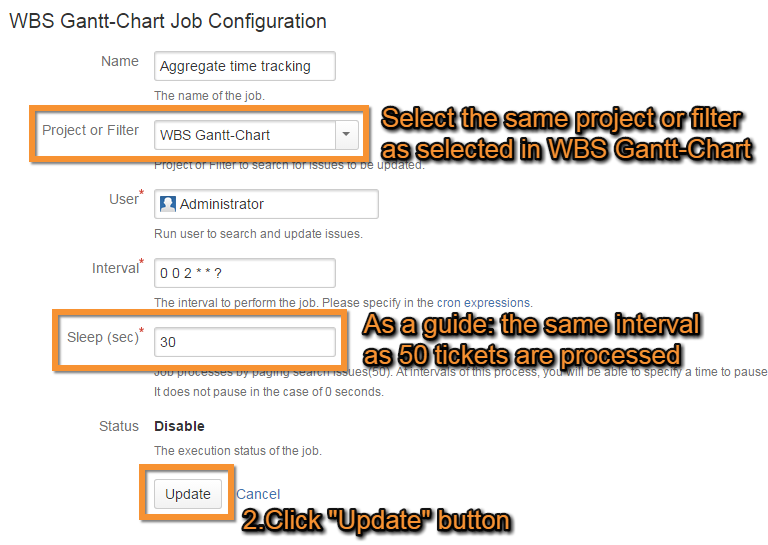
Recommended setting of "Sleep (sec)"
If jobs are performed continuously without pauses, this may result in an excessively high system load. We recommend the setting of 'Sleep (sec)' pauses equivalent to the time required to carry out 50 issues.
Task
A task is the aggregate calculation process carried out for an issue field. Configure the settings as shown below.
|
Item |
Required |
Description |
|---|---|---|
|
Name |
|
Name of task |
|
Field |
|
Fields to be updated by implementing the task results |
|
Script |
|
Calculation program of field value for task execution
|
|
Status |
|
Task status: Enabled / Disabled
|
Aggregating time tracking
The job scheduler has a prepared template which enables you to easily configure jobs with aggregated time tracking.
Follow the steps below to use this template for aggregated time tracking.
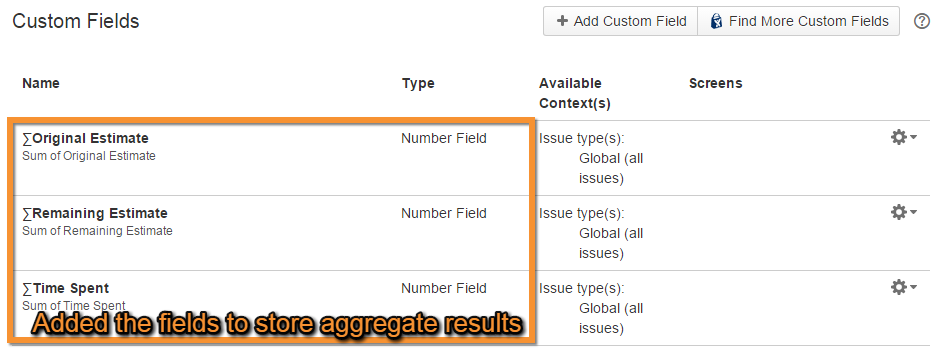
Creating fields to store results
The aggregated results of calculations are stored in the custom fields specified by the tasks. You should create the following custom fields in number field format in advance.
-
∑ Original Estimate
-
∑ Remaining Estimate
-
∑ Time Spent
The results are stored in the custom fields below:
-
Text Field (single line)
-
Text Field (multi-line)
-
Number Field
-
Date Picker
-
Date Time Picker
Creating an "aggregate time tracking" job
You can create an aggregate time tracking job using the following steps:
-
Click the Manage link.
-
Select the Job scheduler menu under WBS GANTT-CHART.
-
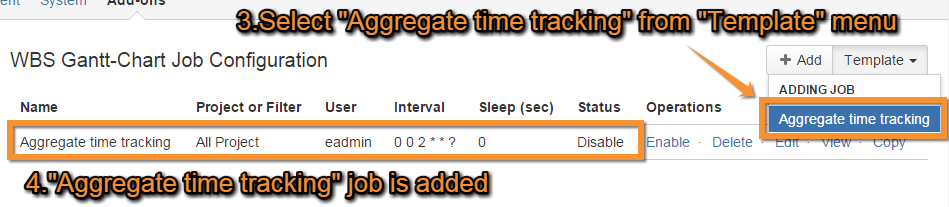
Click the Template link on the job configuration page.
-
Select the Aggregate time tracking template.
Configuring jobs
Items such as Project or Filter and Sleep (sec) are not set for jobs created with the template. You can configure these as shown below.
-
Click the Edit link (under Operations) for your Aggregate time tracking job.

-
Input the required items, and click Update.
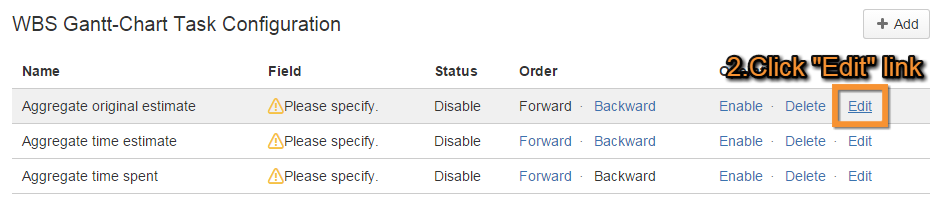
Configuring tasks
You can configure the required task items in the same way as you did for jobs.
-
Click View (under Operations) for your Aggregate time tracking job.

-
Click Edit (under Operations) for the Aggregate original estimate task.
-
Input the required items, and click Update. In this case, select the field ∑ Original Estimate.

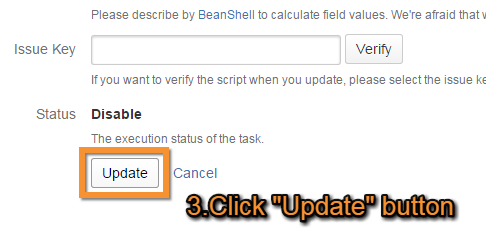
Edit Aggregate time estimate and Aggregate time spent in the same way.
Enabling jobs and tasks
Jobs and tasks are not executed until they are enabled. Their statuses are enabled when Enable is clicked (under Operations). To disable, just click Disable.
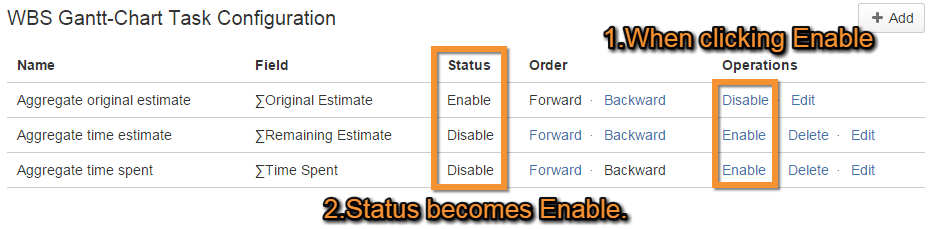

This enables Aggregate time tracking to be carried out at the specified times.
Reflecting time tracking
When using the Reflect time tracking template, you need to register the scheduled jobs.
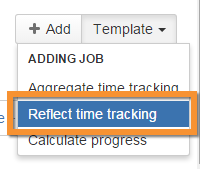
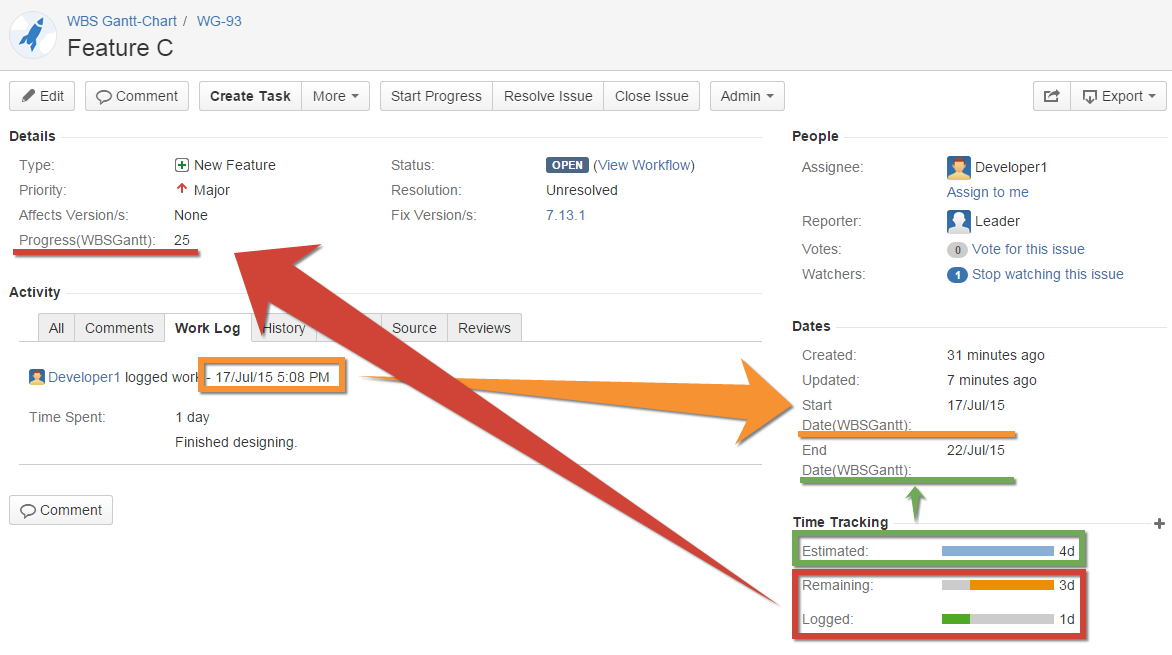
The Reflect time tracking template automatically sets the plan dates and progress rate (percent done) based on the information recorded in the work log. It is mainly used for displaying actual work done in WBS Gantt-Chart.
Note that:
-
The start date reflects the start date of the work log;
-
The finish date is determined by moving forward from the start date by the number of initially estimated work days;
-
The percent done is the progress rate calculated from the work log.
Issue hierarchies are not taken into account.
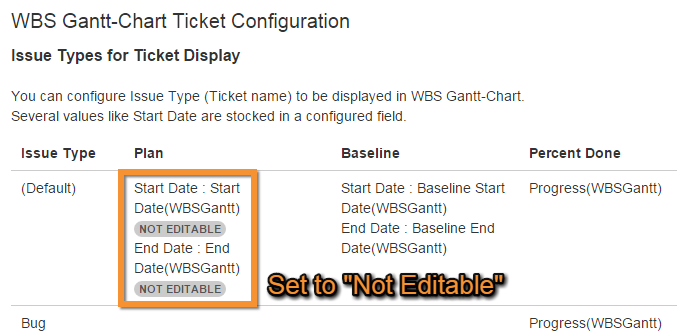
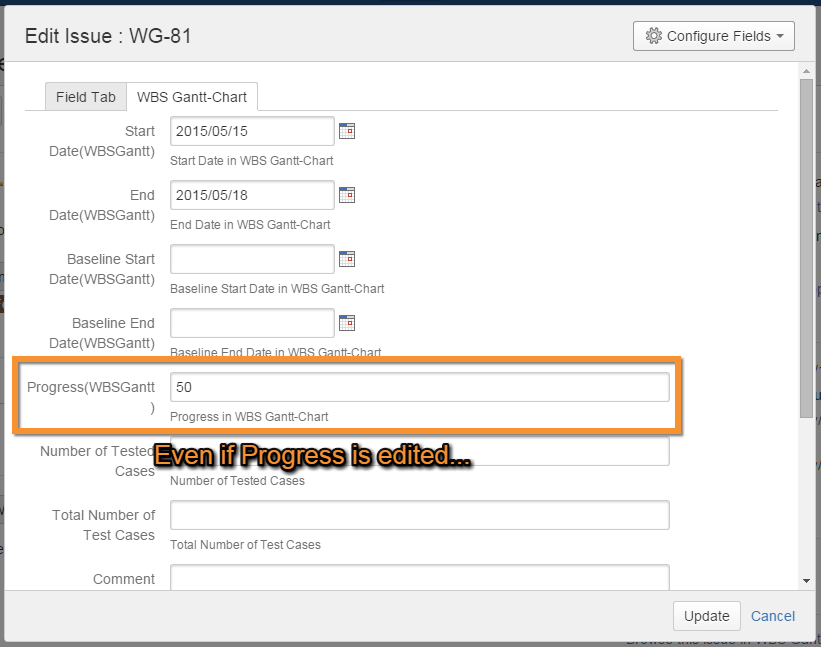
The results of the time tracking calculation are based on the plan start and finish dates and progress rate as configured in the issue settings. However, when plan dates are edited in WBS Gantt-Chart, these are overwritten in the job scheduler. Therefore we recommend that the plan date fields be set to Not Editable.
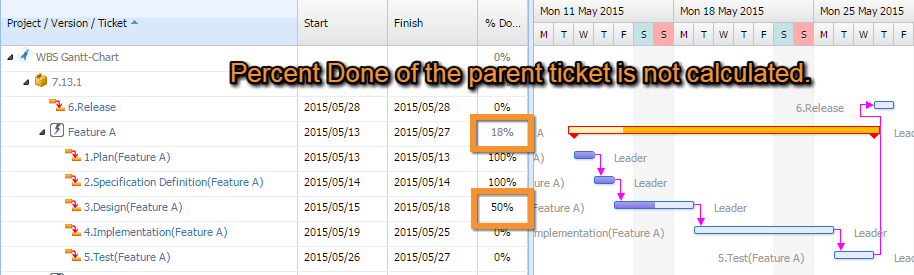
Calculating progress rate
You can register scheduled jobs using the Calculate progress template.
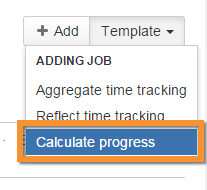
The Calculate progress template works for scheduled jobs in the same way as the aggregate calculation results done by Auto-calculate Percent Done in WBS Gantt-Chart. Select Progress (WBSGantt) as the field for storing the aggregate calculation results.
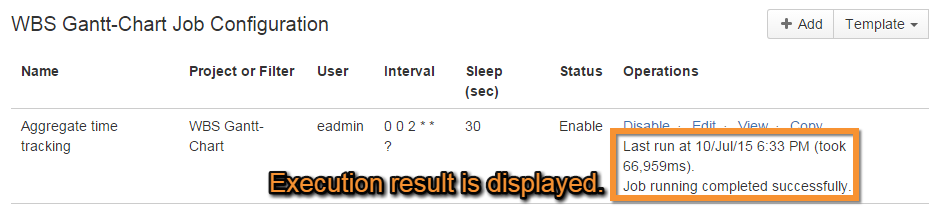
Viewing the results of executed jobs
The time spent and the result of the last performed job is displayed under Operations on the job configuration page.
Other settings
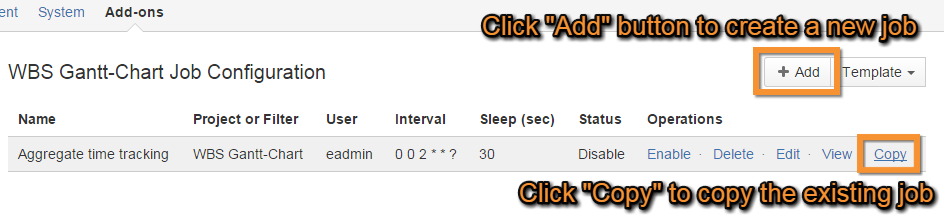
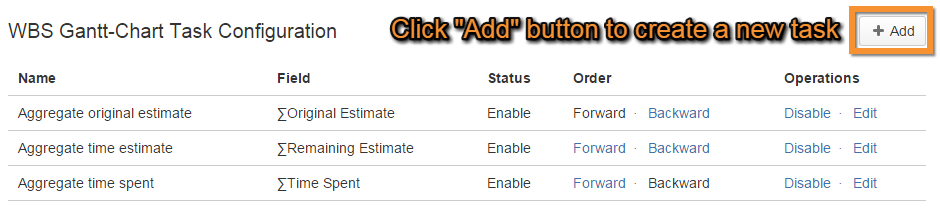
Adding new jobs and tasks
You can create new jobs and tasks, as well as creating them from the templates. Click the + Add link on the top right-hand side of the job configuration or task configuration screen.
You can also copy an existing job by clicking Copy (under Operations).
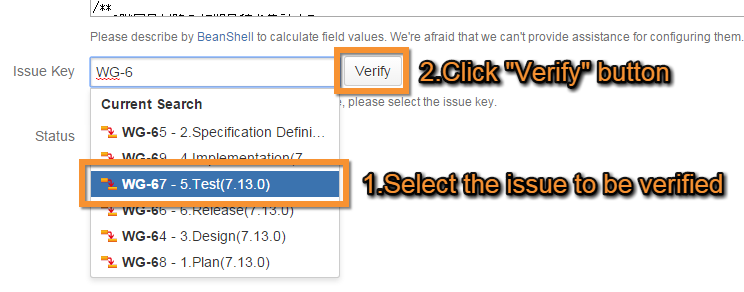
Verifying scripts
Scripts implemented in tasks can be verified, even without a job being executed.
-
Input the issue key of the issue to be verified in Issue Key in the task configuration screen.
-
Click Verify.
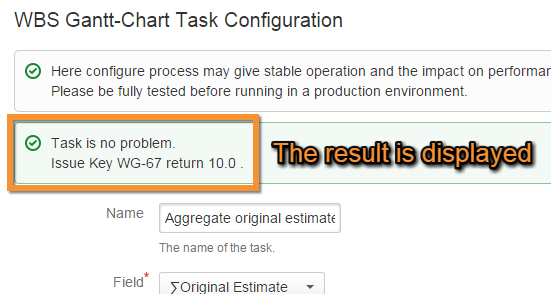
The result is displayed at the top of the screen.
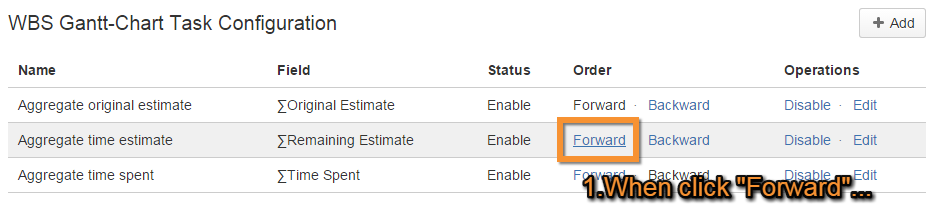
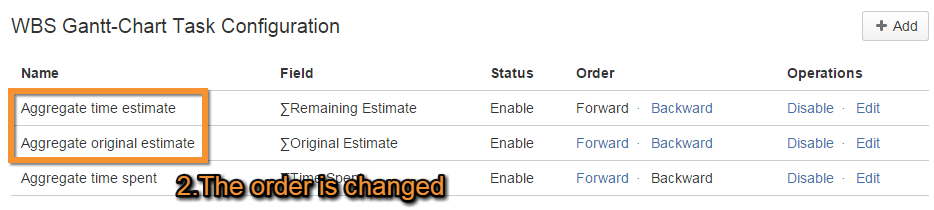
Changing the order in which tasks are executed
You can change the order in which tasks are executed by clicking Forward or Backward in Task Configuration.
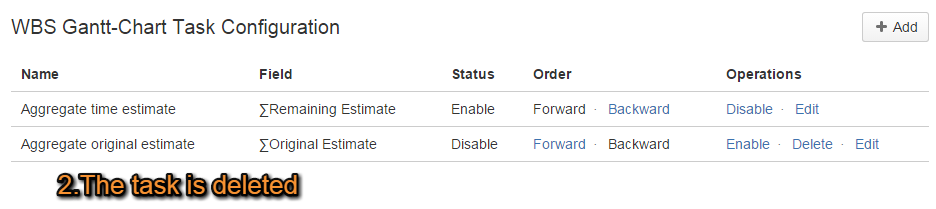
Deleting jobs and tasks
You can delete jobs and tasks by clicking Delete (under Operations). However, you cannot delete a task if the status is set to Enabled.

If you have any questions please feel free to ask a member of the Atlassian community!
Add the tag "addon-jp.ricksoft.plugins.wbsgantt-for-jira" when you ask a question.