How to establish synced spaces
To sync spaces, the space administrators have to configure Space Sync for Confluence.
Watch the tutorial video to get started:
Add a new sync
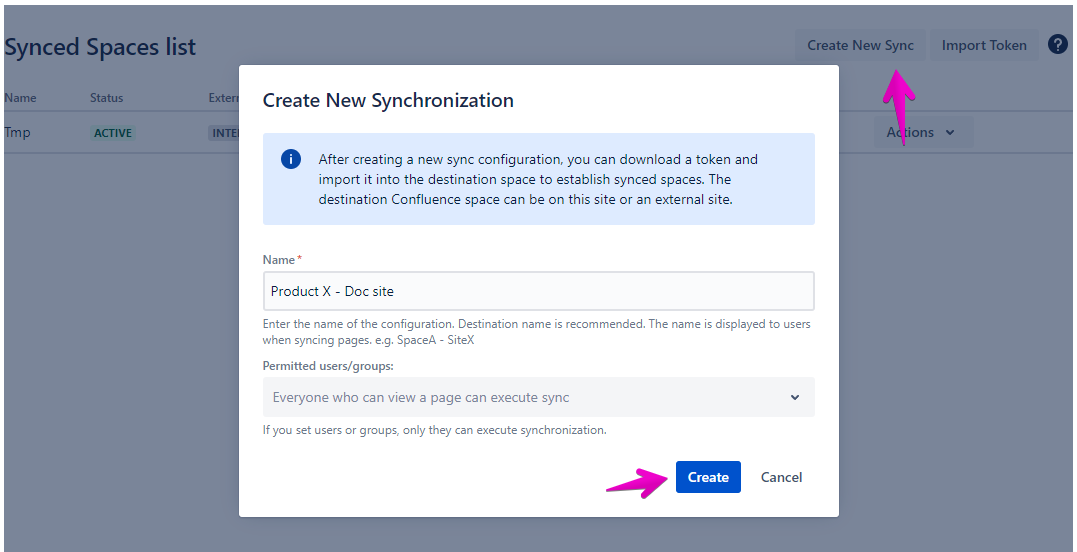
Step 1: Create a new sync setting
Press the “Create New Sync“ button.
Enter the Name., e.g. the destination space.
Press the “Submit“ button.
You can see a new row in the synced spaces list.
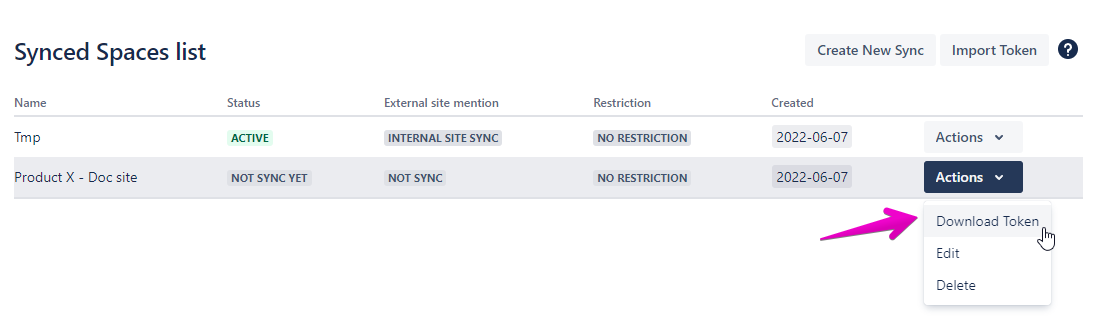
Step 2: Download a token, and send it to the destination space administrator
Expand the “Actions” menu, and click “Download Token“.
Enter Message. This message is shown when the destination administrator imports the token.
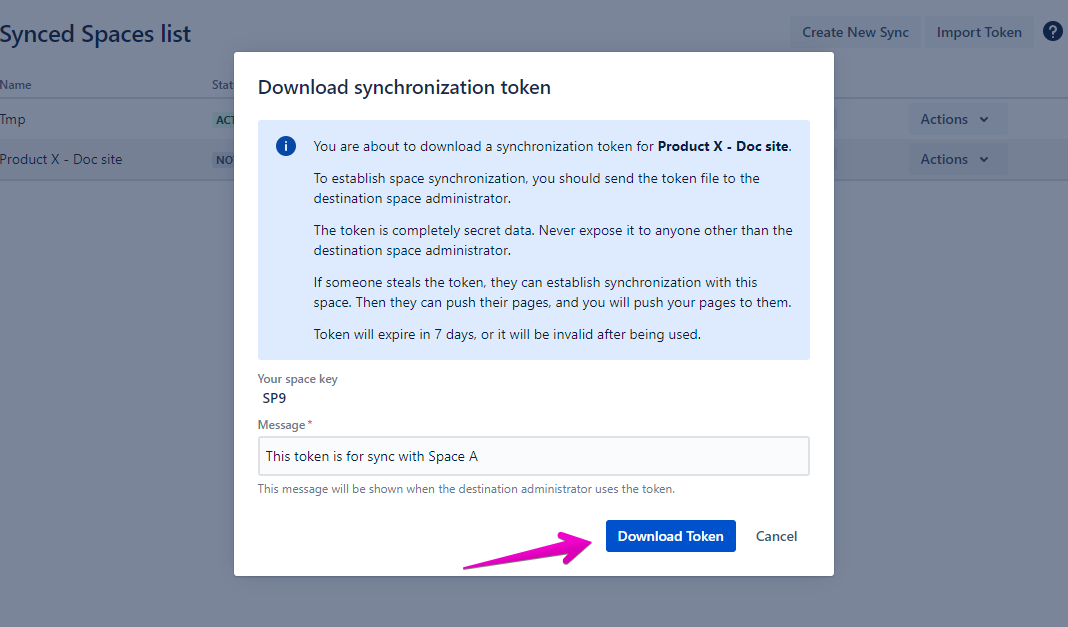
Press the “Download Token“ button.
You can download a token file for the setting.
Send the file to the destination space administrator via e-mail, slack, etc.
The token is completely secret data. Never expose it to anyone other than the destination space administrator.
Token will expire after 7 days, or it will be invalid after being used.
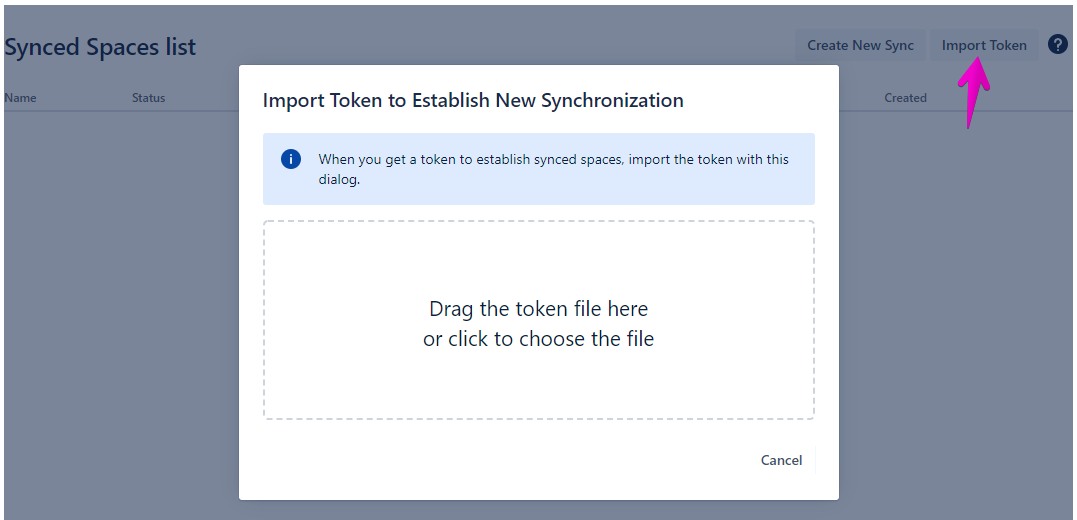
Step 3: Import the token
This operation is done by the destination space administrator
Press the “Import Sync“ button…
Drag and drop the sync token from the previous step
Enter the Name, e.g. the source space
Press the “Import“ button
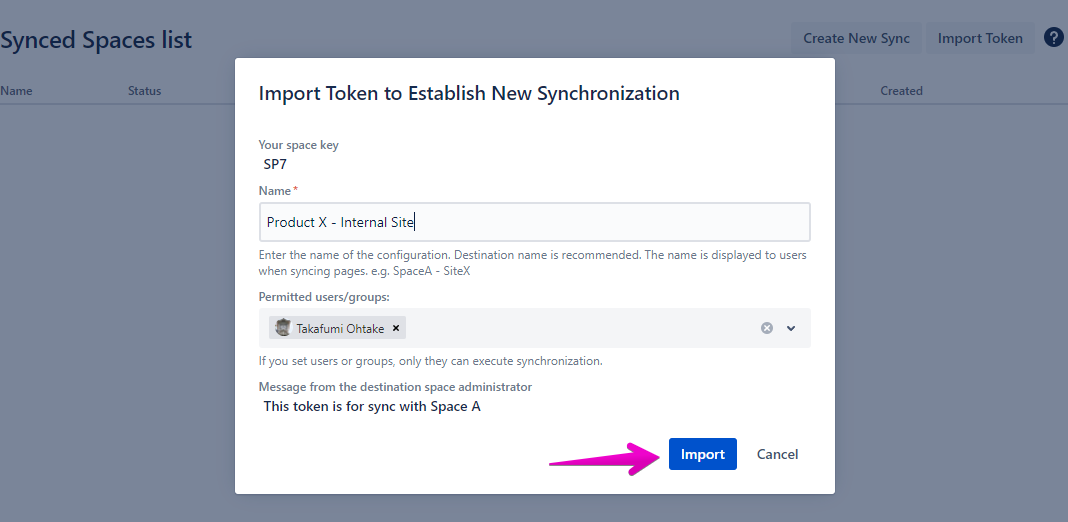
You can see a new row in the synced spaces list
Configure space sync
Once you’ve connected a new space sync, you can configure the sync settings based on requirements:
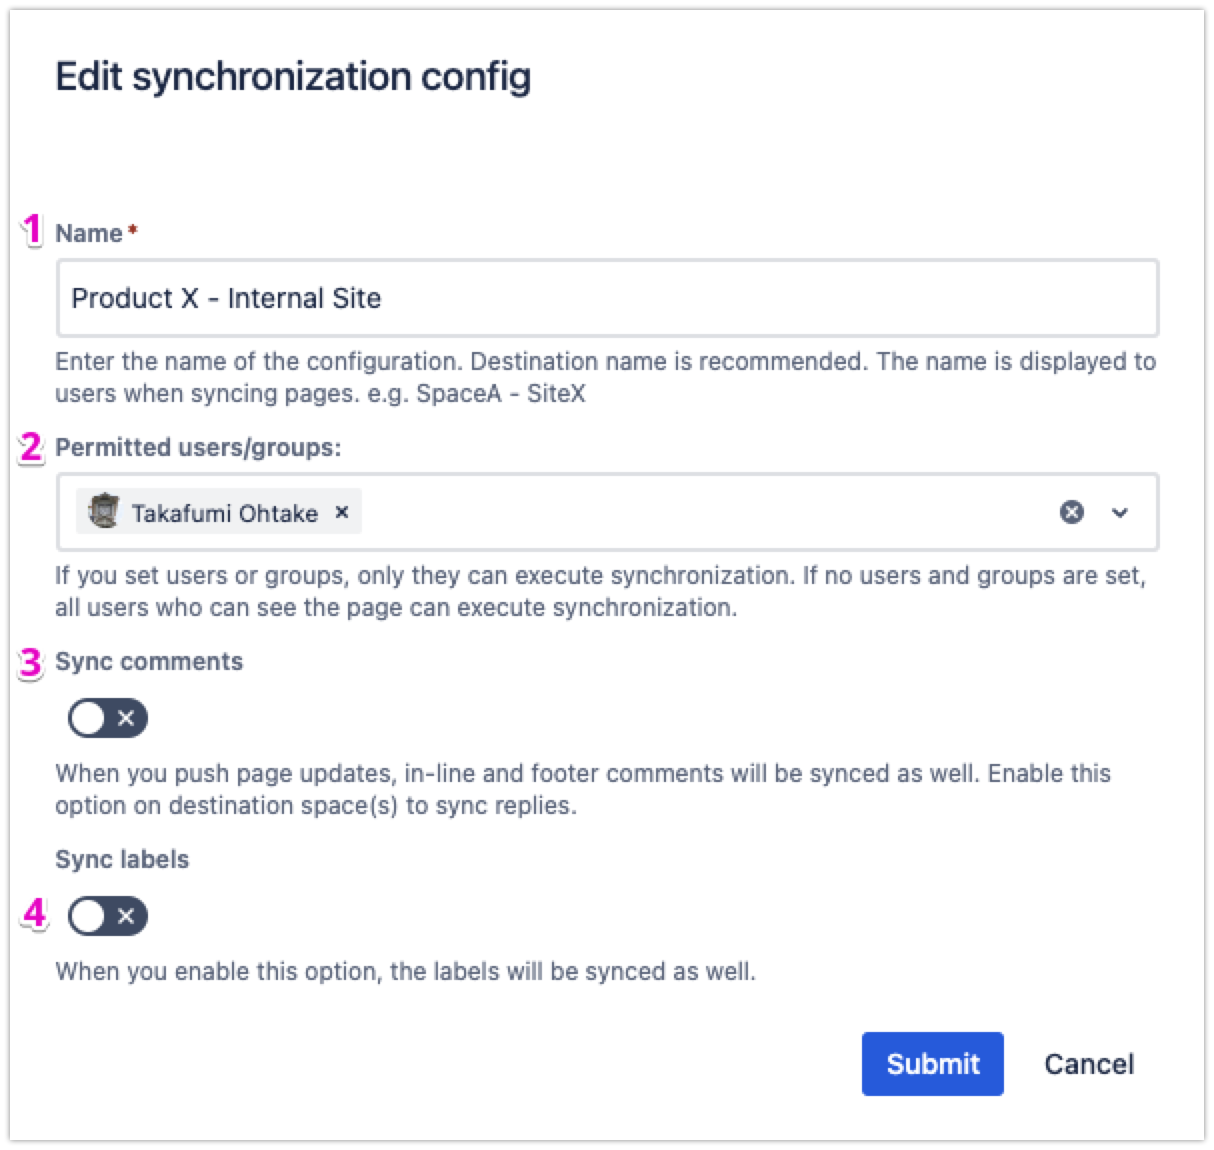
Edit the name of the configuration
Grant user permissions to execute page sync
Enable comments sync
Enable labels sync
Read more: What content is synced