Global issue view settings - display mode, start/finish date, and percent done
Configuring issue view settings
Log in as a user with the Jira System Administrators and Jira Administrators global permission.
Select Add-ons from the Jira ADMINISTRATION menu shown as the cog icon at the top-right corner.
Select Issue view from the WBS GANTT-CHART section on the side menu.
Changing the issue display mode
Click the link where it says Click here on the issue configuration screen (under Issue Display Mode).
Please refer to this document if you need more information about the issue display mode.


Adding issue types for display
If the current issue display mode is set to displaying specified issue type mode, you need to specify the issue types to be displayed.
To add an issue type, follow the steps below:
Click Add Issue Type on the upper right-hand side of the issue configuration screen.
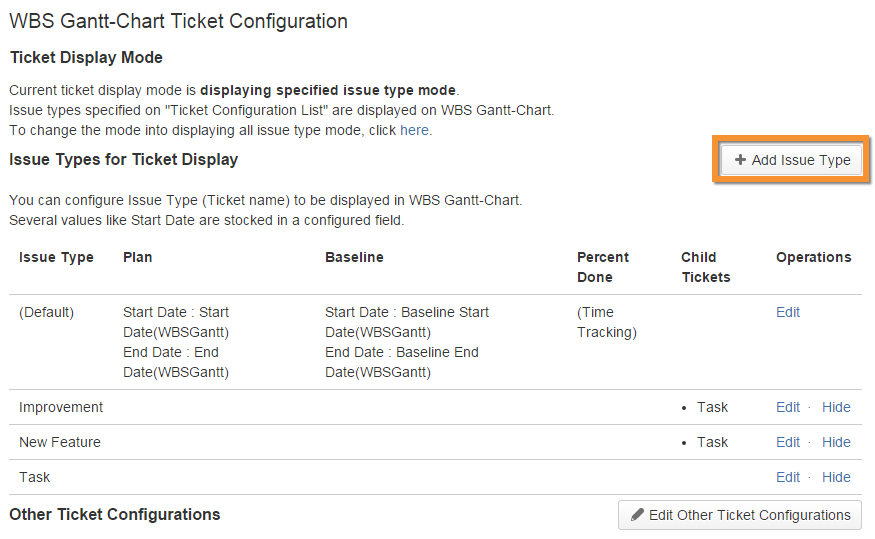
2. Select an Issue Type.
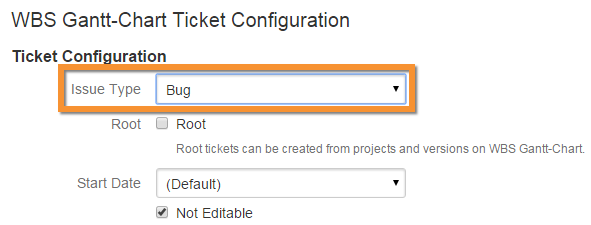
3. Configure the various settings, as shown below.
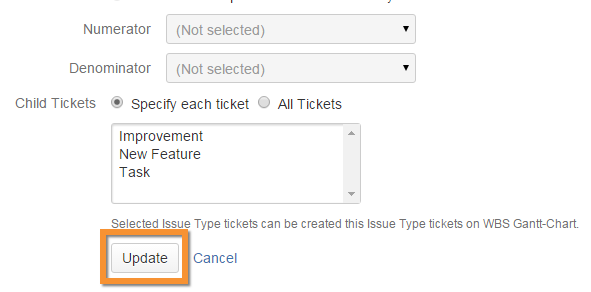
4. Click Update.
5. The issue type is added, as shown.
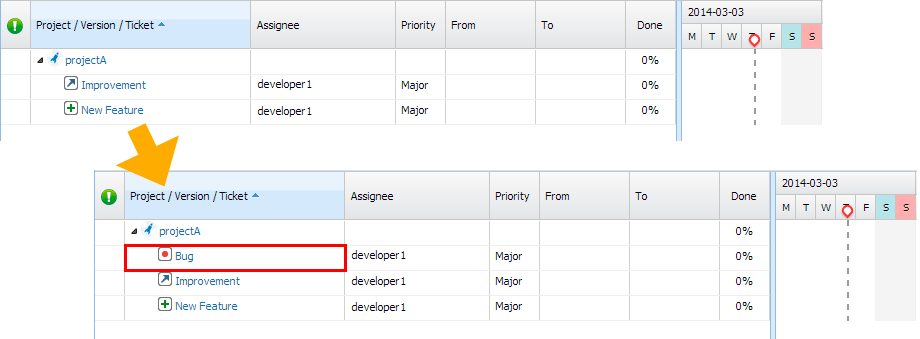
Changing issue settings
Issue settings, such as plan dates and progress rate (percent done) displayed in WBS, and child issue issue types, can be updated as follows:
Click the Edit link for the issue you wish to edit.
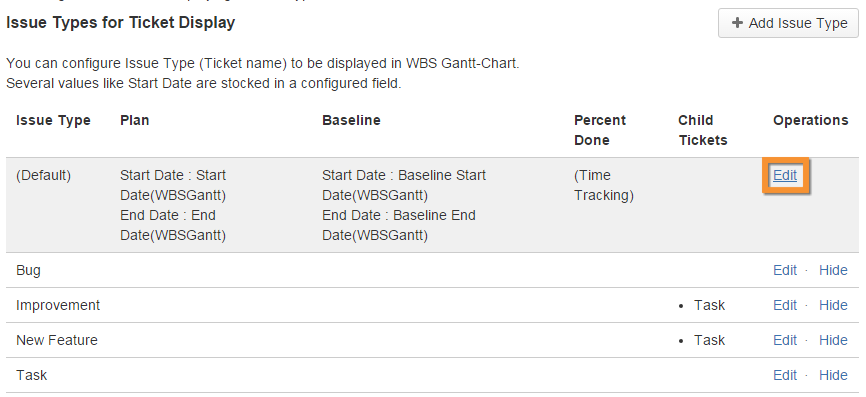
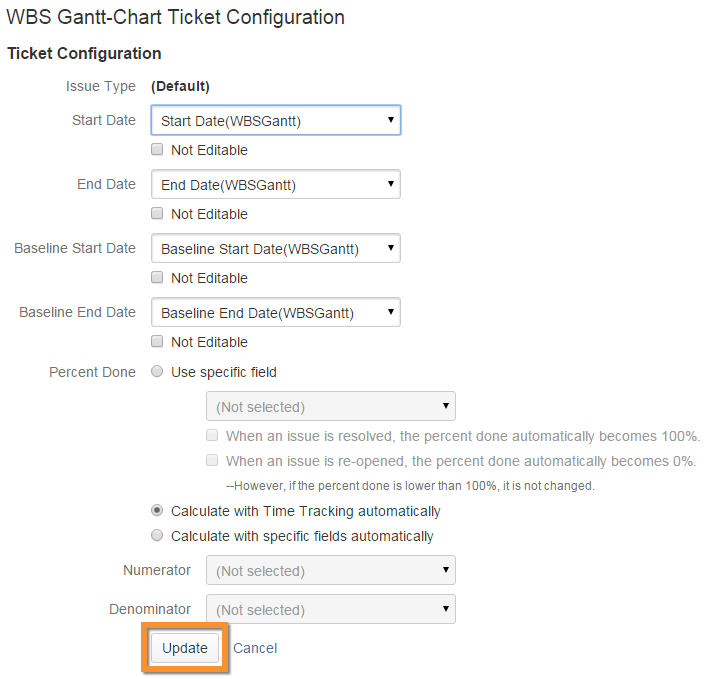
Configure the various settings, as shown below.
Click Update.
Hiding displayed issue types
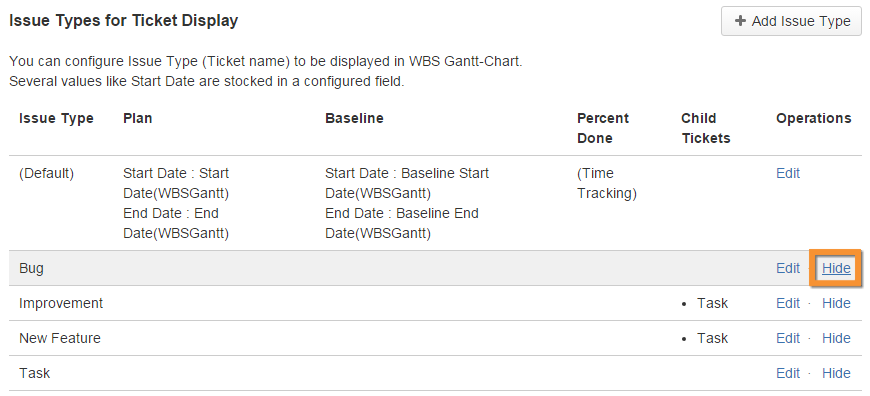
Click Hide on the far right-hand side of the issue type row.
Editing the plan and baseline fields
Instead of using the custom fields included when you first install WBS Gantt-Chart, you can use other custom fields for the plan and the baseline, such as Create Date or Due Date.
To edit these, select a field from Start Date, Finish Date, Baseline Start Date and Baseline Finish Date, in the issue configuration dropdown menu. The list of options is as follows:
Datepicker custom field
Date & Time Picker custom field
Create Date
Due Date
(Default)
If (Default) is selected, the default settings fields are used. However, note that selecting the same field for Start Date, Finish Date, Baseline Start Date, and Baseline Finish Date may lead to unexpected errors in the performance of the software.
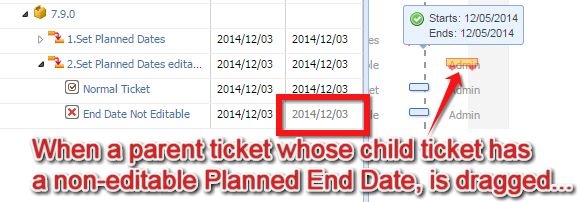
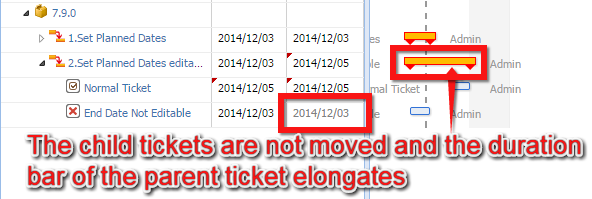
If you wish to make these four dates non-editable (view only), check the Not Editable box for each date. When Create Date is selected as a field, it will always be "Not Editable".
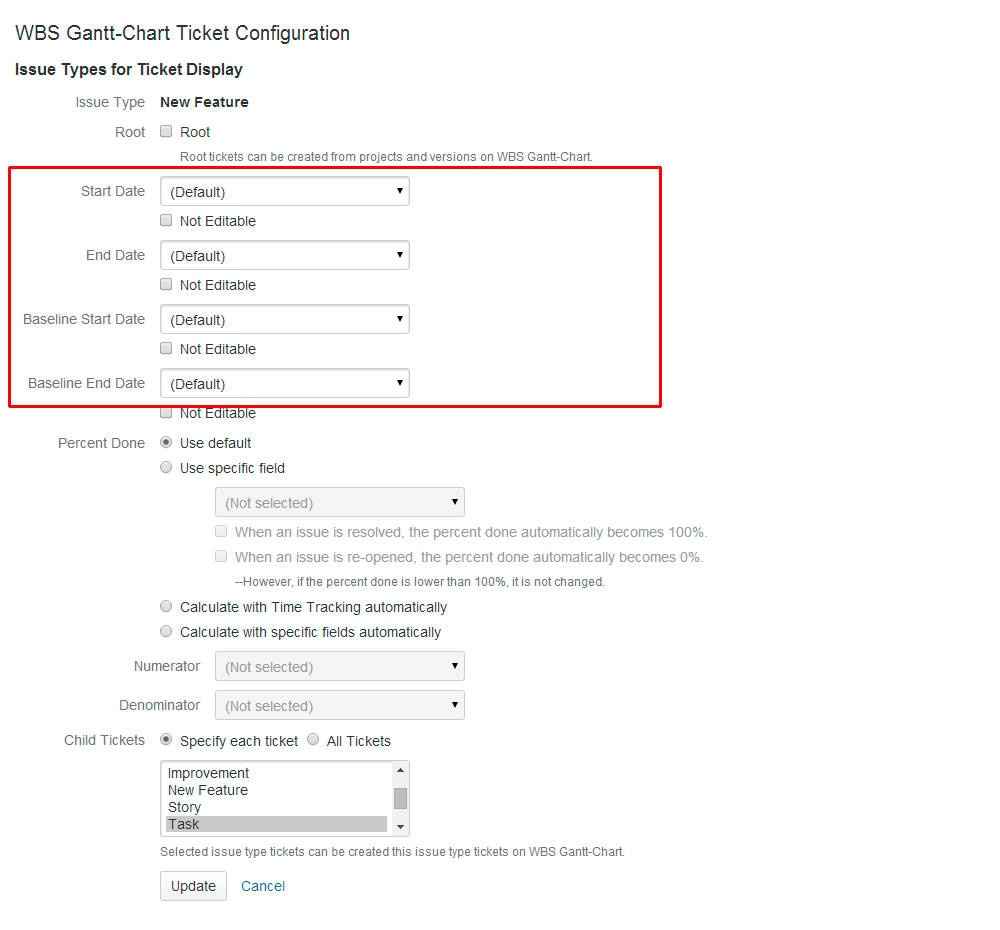
If the plan dates are set to Not editable, they will not be adjusted when you use Cascade Changes or Auto-correct Schedule. Therefore we advise you not to check the Not Editable boxes unless you have a specific reason to do so.
Editing the progress rate
In the issue configuration screen, select Percent Done. You can select one from four configurations as follows:
Use default
Uses the default progress rate settings.
Use specific field
The percent done is based on specified numeric fields. You can edit these values in WBS Gantt-Chart.
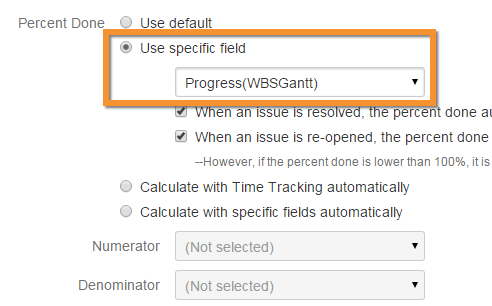


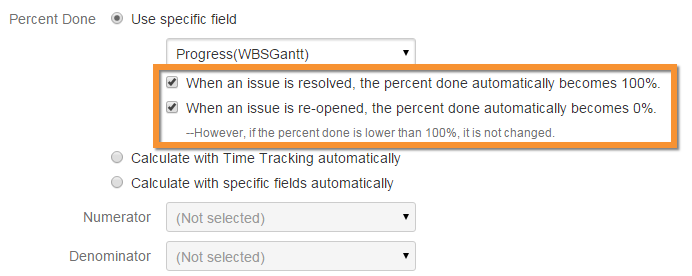
(Option) When an issue is resolved, the percent done automatically becomes 100%
Automatically updates the value of the field specified in "Use specific field" to 100 when the issue is resolved.
It works when the issue resolution field value is updated from empty to non-empty.
(Option) When an issue is re-opened, the percent done automatically becomes 0%
Automatically updates the value of the field specified in "Use specific field" to 0 when the issue is re-open.
It works when the issue resolution field value is updated from non-empty to empty.
Calculate with time tracking automatically
Automatically calculates progress rate based on the "time spent" and the "time remaining estimate." The equation is as follows:
Time Spent / (Time Spent + Time Remaining Estimate) * 100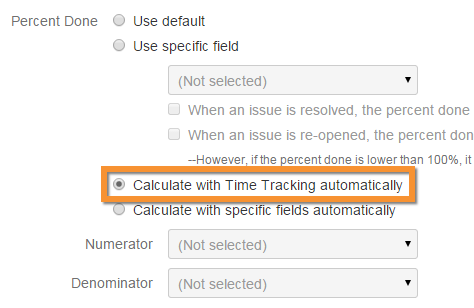
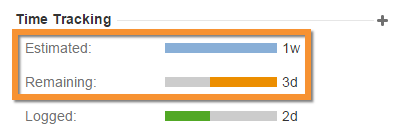

Calculate with specific fields automatically
Automatically calculates progress rate based on the selected fields for Numerator and Denominator. You cannot edit these in WBS Gantt-Chart. The equation is as follows:
Numerator / Denominator * 100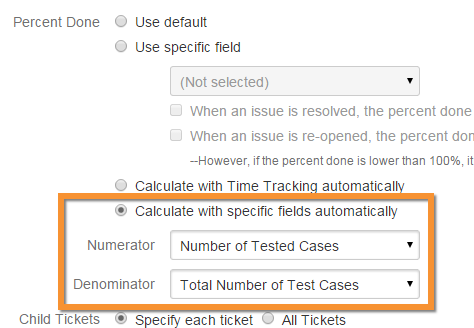
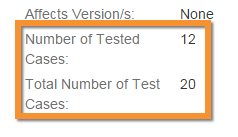

Updating percent done automatically
If you select Use specific field, the progress rate updates automatically depending on the status of the issue.
Where the following boxes are checked - When an issue is resolved, the percent done automatically becomes 100% or When an issue is re-opened, the percent done automatically becomes 0% - percent done automatically displays 100% when an issue is resolved, and resets to 0% if an issue is reopened.


Editing child issue issue types
When creating a child issue from an issue, you can restrict by issue type.
To restrict by issue type
Select the issue type for the child issue to be created, by selecting Individually specified in Child issue issue type on the issue configuration screen.
To lift all restrictions
Select All issue types to be displayed in Child issue issue type on the issue configuration screen.
Editing the maximum number of issues to be displayed
If too many issues are displayed this may lead to a deterioration in the performance of the software. To prevent this, you can edit the maximum number of issues to be displayed.
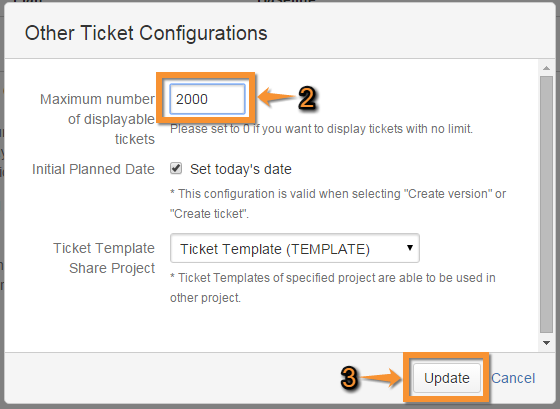
Click Edit Other Issue Configurations in the issue configuration screen (under Other Issue Configurations).

Edit Maximum number of displayable issues. If you do not wish to set a limit, just enter “0”.
Click Update.
Setting the creation date in the schedule when creating an issue or version
When you create a version or issue from a project or version, you specify whether to set the creation date as the planned date.
If an issue does not have a planned date set, the Auto-Correct Schedule function may not work correctly. Please enable Set today’s date unless there is a specific reason not to do so. This setting is disabled in all versions earlier than 7.9.0.
Click Edit Other Issue Configurations in the issue configuration screen (under Other Issue Configurations).
Check the box Set Creation Date in Initial Planned Date.
Click Update.
Sharing Issue Templates
Issue templates are created and managed on a project by project basis. You cannot create an issue using the issue template of another project.
You can resolve this by sharing issue templates for specified projects across all projects.
Specify that a project's issue templates can be shared in Issue Template Share Project on the issue configuration screen.
You can use issue templates across all the projects you specify. You can also restrict the editing of issue templates by adjusting the permissions for the specified project.
Restricting the use of Drag-and-drop
When changing issue structures by 'dragging-and-dropping' an issue, you can make changes in the structure outside the allowable combinations of issue types for parent-child relationships.
In order to restrict the use of drag-and-drop for child issues to allowable combinations for parent-child relationships, please enable Restrict for configuring child issues in Restrictions for using drag-and-drop to ensure the right configuration for creating child issues.
Additional Help
If you have any questions please feel free to ask a member of the Atlassian community!
Add the tag "addon-jp.ricksoft.plugins.wbsgantt-for-jira" when you ask a question.
