
How to Restore a Gantt Chart in Gantt Chart Planner (Cloud)
All Gantt chart data in Gantt Chart Planner for Confluence Cloud is stored as a .json attachment directly on the Confluence page hosting the Gantt macro.
Restoring from within the app
If you can see and open the Gantt chart app on your page, we recommend using the built-in version history feature to restore previous versions of your chart:
👉 Version history and restore a version
Restoring directly from page attachments
If the Gantt macro has been deleted from the page or fails to open, you can restore your data directly using Confluence page attachments.
Restoring an older file version on the same page
-
Open the Confluence page and access the Attachments menu:
-
Click the Information (ℹ️) button in the side toolbar (or press
Ctrl + Shift + I/Cmd + Shift + Ion Mac). -
Select Attachments.
-
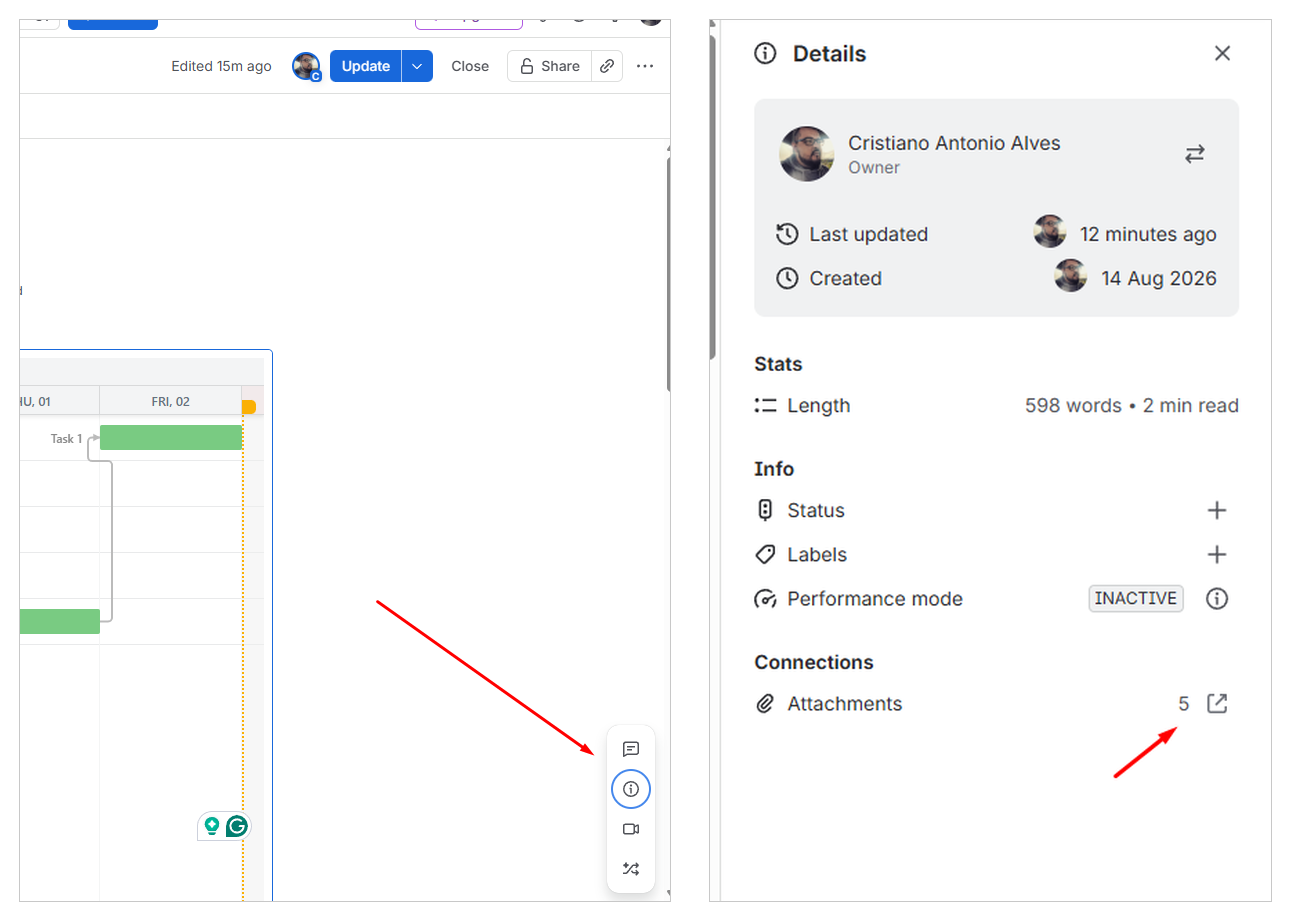
How to access the Attachments page
-
-
Locate the
.jsonfile associated with your Gantt chart (e.g.,gantt_XXXXX.json). -
Click the arrow next to the attachment name to expand its Version History.
-
Download the specific previous version of the JSON file you want to restore.
-
Upload that downloaded file back to the page with the exact same file name to make it the active latest version.
-
Refresh the Confluence page to reload the chart with the restored data.
Recovering after macro deletion or moving to a new page
-
Download the backup file:
-
Open the Attachments menu on the source page (click Information ℹ️ or press
Ctrl + Shift + I> Attachments). -
Download the latest
.jsonGantt data file to your computer.
-
-
Add a new macro to the target page:
-
Edit the target Confluence page.
-
Type
/ganttand insert a new Gantt Chart Planner macro. -
Publish/update the page (this generates a new, empty JSON attachment on the page).
-
-
Identify the new macro attachment name:
-
Open the Attachments menu on the target page (click ℹ️ or press
Ctrl + Shift + I> Attachments) or type/attachmentsfor Attachments macro. -
Note the exact file name generated for the new macro (e.g.,
gantt_YYYYY.json).
-
-
Upload and replace the data:
-
Rename your downloaded backup
.jsonfile to match the newly generated filename (gantt_YYYYY.json). -
Drag and drop (or upload) the renamed file into the target page's Attachments list to overwrite the default empty attachment.
-
-
Refresh the Confluence page to verify that all tasks, milestones, and dependencies appear.
⚠️ Troubleshooting & Tips
-
File Name Mismatch: The uploaded file must match the new macro's generated attachment name exactly. If the name differs, the macro will continue pointing to its empty file.
-
File Extension: Ensure the file retains its
.jsonextension so Confluence Cloud handles the data format properly. -
Permissions: Make sure you have both Add Attachments and Edit Page permissions in the Confluence space.